Creating a Simple Mod
In this tutorial, we will create a mod consisting of a single level where the player must create triangles from single blocks. The principals in this tutorial suffice to create any level where the inputs and outputs are unchanging - which includes any level in the "Assembly" chain of the campaign. Levels with randomized inputs and outputs require more advanced techniques than discussed here.
Download a template for this mod here. The completed result of the tutorial can be downloaded here
Setup
Download the simple mod template here. This is a single folder with the following contents:
- A
manifest.luafile which describes the content of the mod and how these files should be displayed. - A folder "Example Level" which contains...
- ...A
setup.luafile, which describes various global properties of the level. - ...A
start_savefile, which is a save state that is loaded whenever the player wants to create a new save for this level. The provided file is just an empty 30 x 30 level.
Move this file into the modding directory, which can be found as follows:
- Windows: $APPDATA/Local/Warp Factory/Mods (where $APPDATA is your app data directory - probably $HOME/AppData)
- Windows: ...or in a "Mods" folder in the same directory as Warp Factory.exe
- Mac: Mods ~/Libraray/Application Support/warp-factory-game/Mods
- Mac: ...or in a "Warp Factory Mods" folder in the same directory as the app.
To test that this worked, open Warp Factory and navigate to the "Mods" menu. A tab labeled "Minimal Example" should appear and, if you click on this, it will bring you to a level select screen, where you can enter the chapter "Example Chapter" and then open the level "Example Level". This will just bring you to an empty level with all of the usual tools unlocked - plus a few extra tools.
How Levels Work
All levels in the campaign feature significant activity off-screen; the user only views the center part of a larger simulated area.
Generators produce an infinite stream of copies of a single object and create a glowing reflection of this object somewhere in the visible area. They have three attributes: - A mirror source around the original object. - A mirror target, where the object should be displayed to the player. - A generate rectangle, where the objects should be copied to. Each tick, the generator checks whether the generate rectangle is empty. If so, it copies whatever is inside the mirror source rectangle to the generate rectangle. All of these rectangles should be of the same size.
Checkers inspect objects that are output to them and decide whether to accept or reject them. They have four attributes: - A mirror source around the desired object. - A mirror target, where the object should be displayed to the player. - A check rectangle, where objects will be checked for correctness. - A dispose rectangle, where objects will be destroyed. Each tick, the checker looks to see if there is an object touching the right edge of its check rectangle. If so, it compares the object in the check rectangle to the one in the mirror source rectangle. If they are the same, it allows the object to pass. If they are different, the object is blocked from moving any further right. The checker also looks to see if an object is touching the bottom right corner of the dispose rectangle. If so, it deletes everything in the dispose rectangle. As with generators, all of these rectangles should have the same size.
We will build a level with a single generator and a single checker - but a level may use as many of each as it requires, and there are many advanced attributes not mentioned here.
Building a Frame
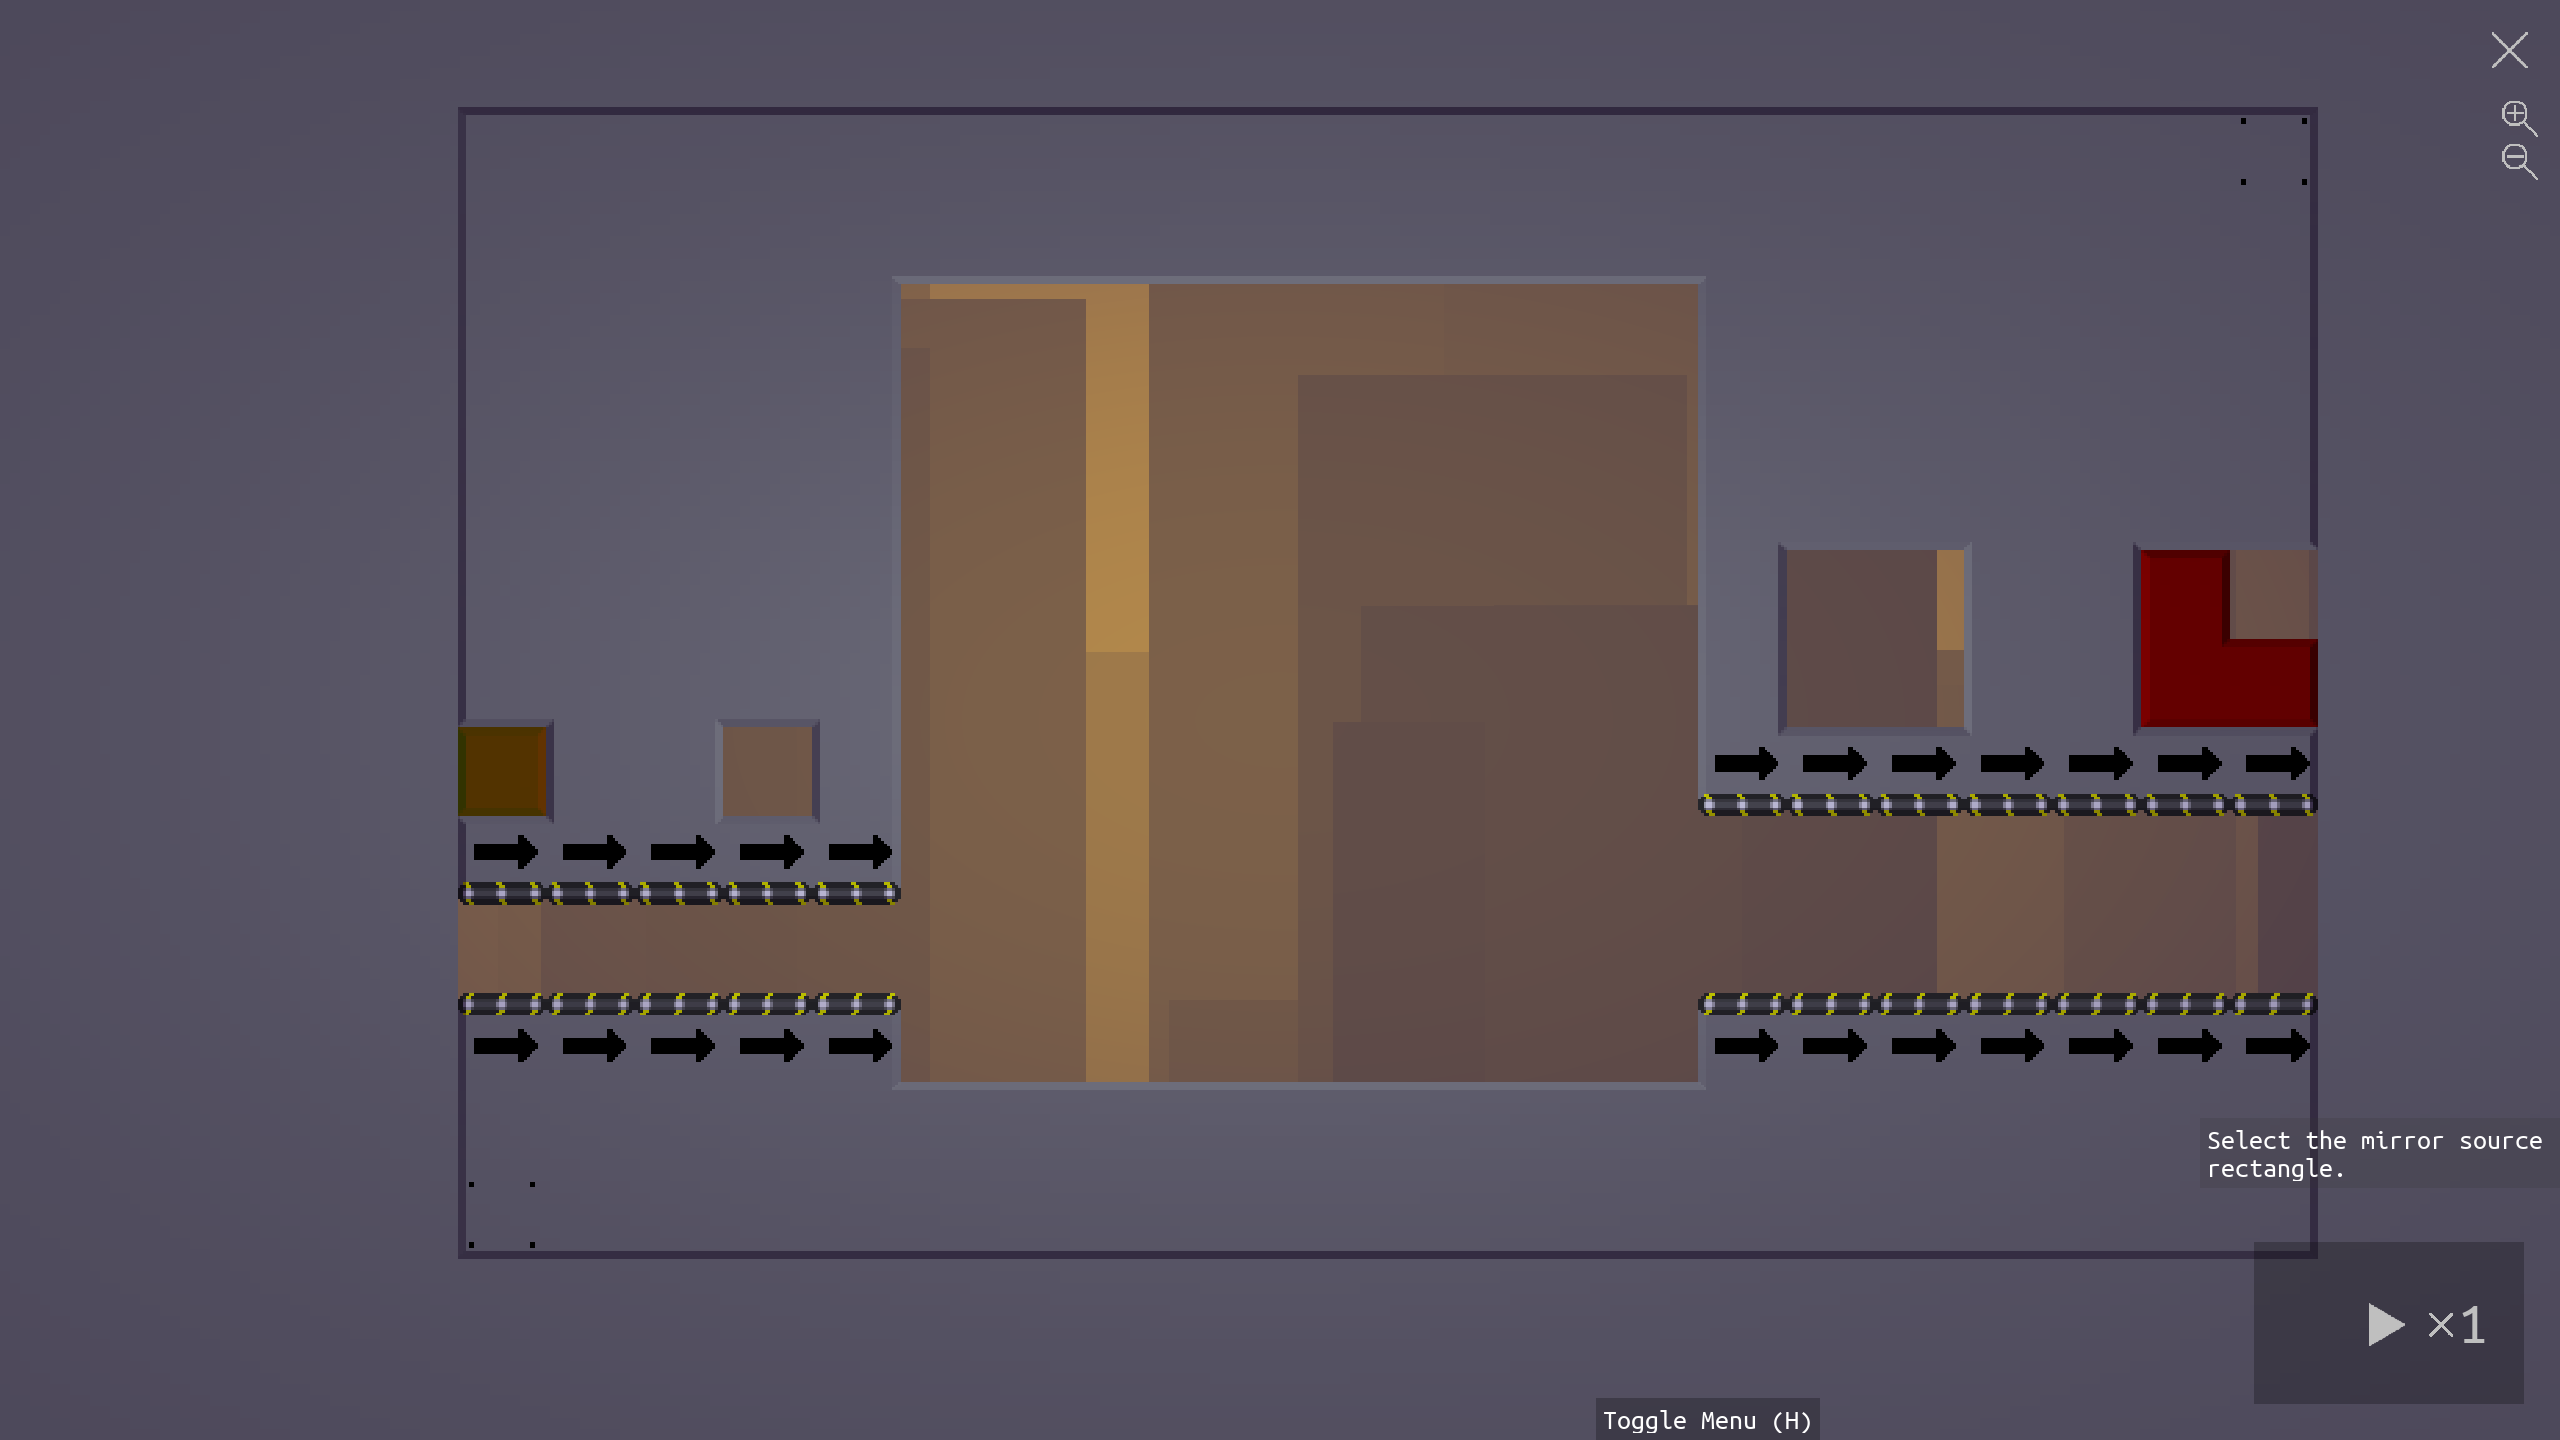
Start out by building a frame for the level - at a minimum, we need to create spaces for the generator and checker on the left and right respectively.
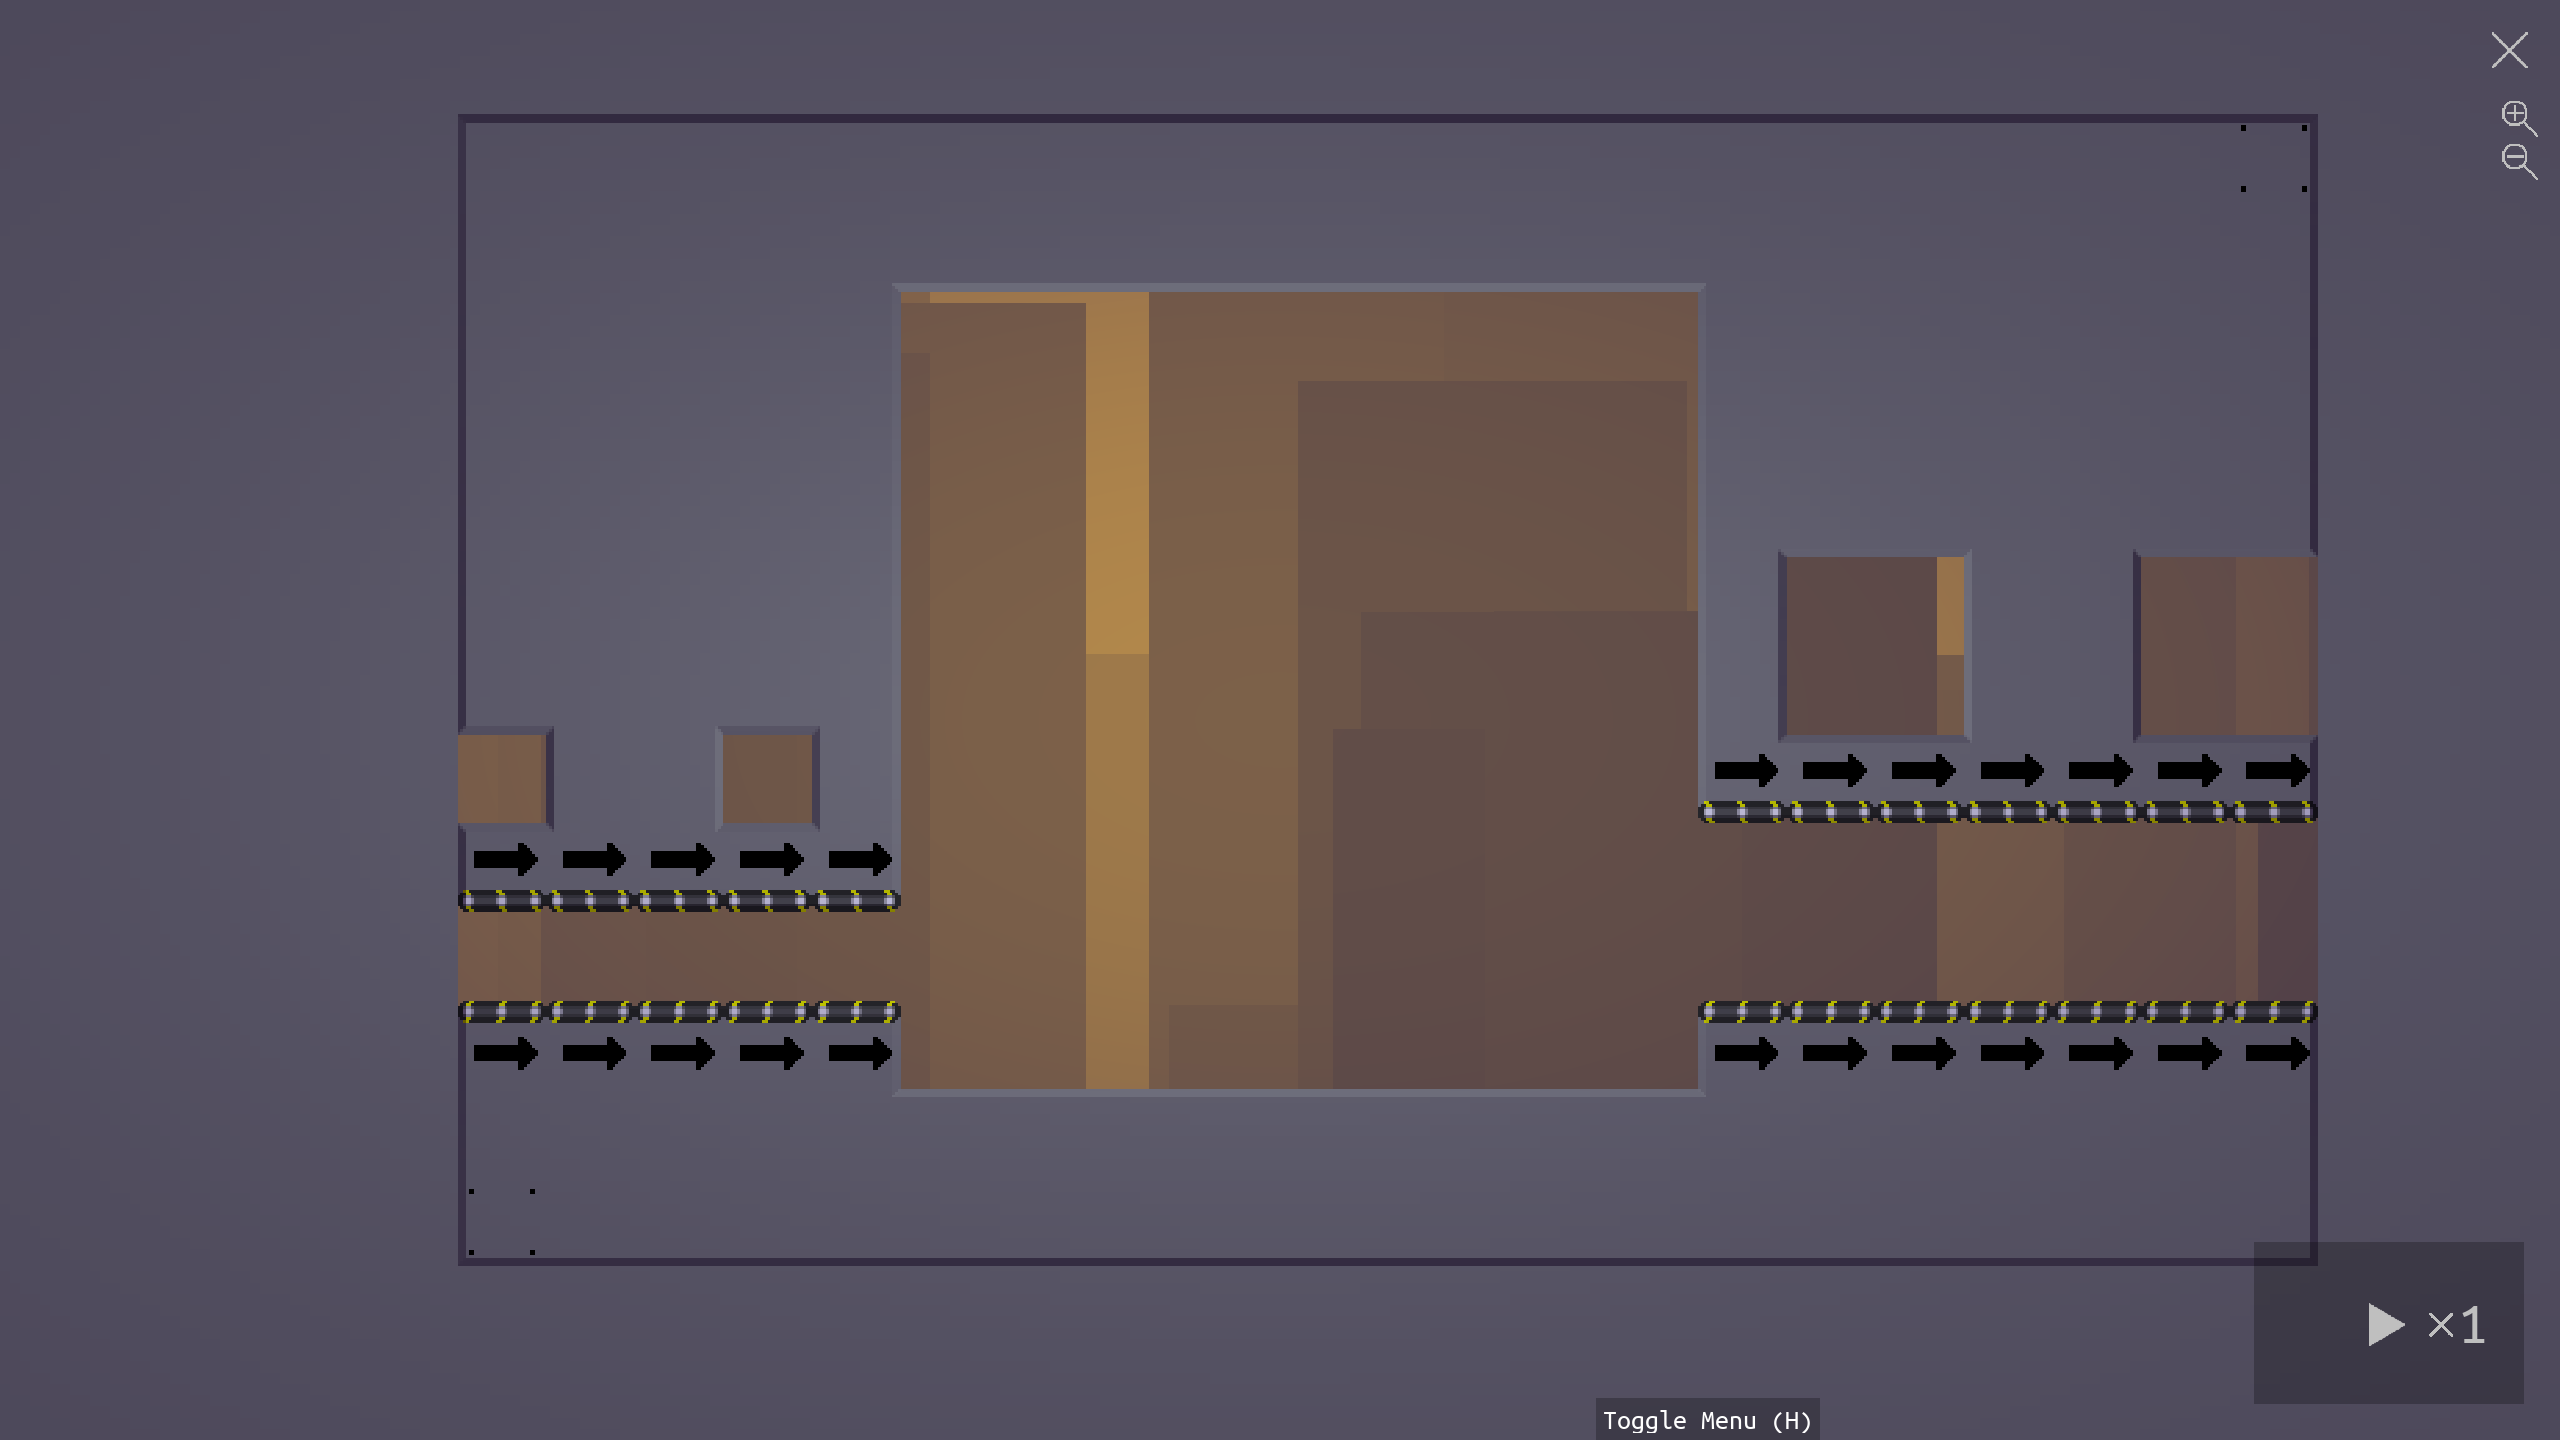
This frame is set up according to the standards followed in the campaign levels, although you are free to make any frame so long as there are spaces for the active components. The frame is thick enough so that, later, the player's view can be restricted so that they see a frame of blocks around the level and cannot see the outer edges of the level. It is also pinned in place to prevent movement. There are several important locations in this frame:
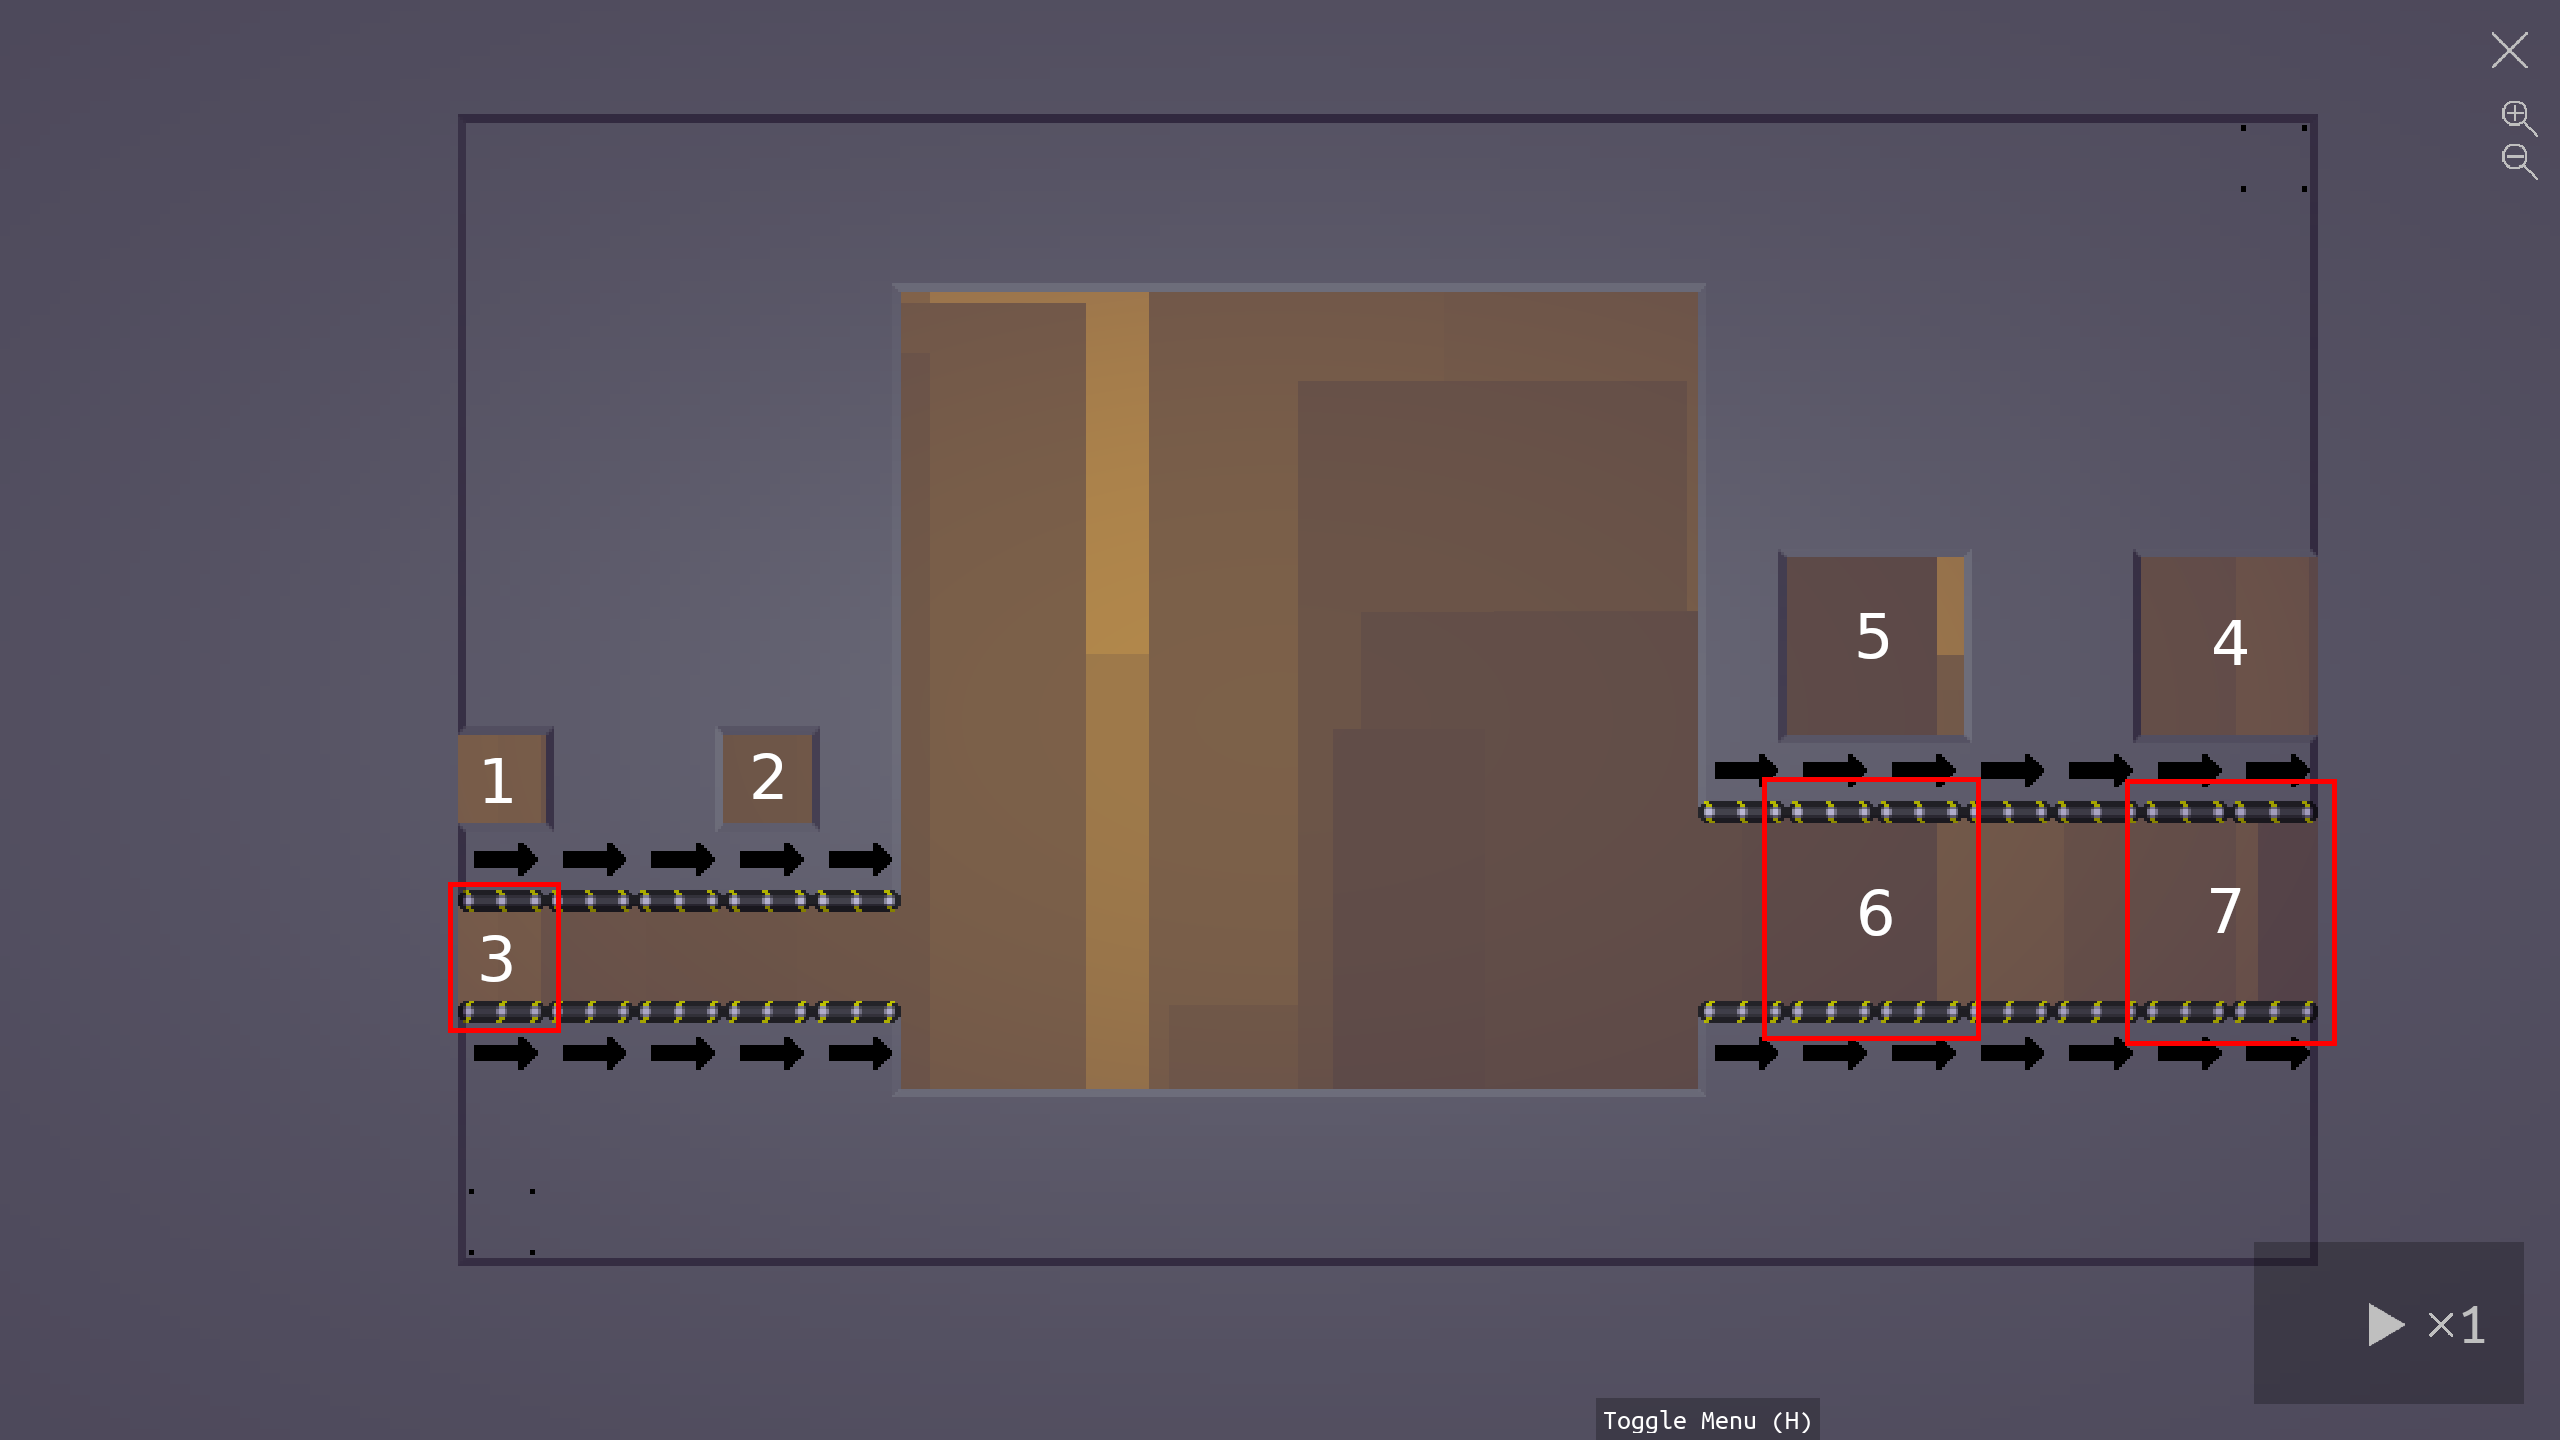
We have three positions to comprise a generator:
- Position 1: A space for the mirror source.
- Position 2: A space for the mirror target.
- Position 3: A space for the generate.
As well as four more for the checker:
- Position 4: A space for the mirror source.
- Position 5: A space for the mirror target.
- Position 6: A space for the check rectangle.
- Position 7: A space for the dispose rectangle.
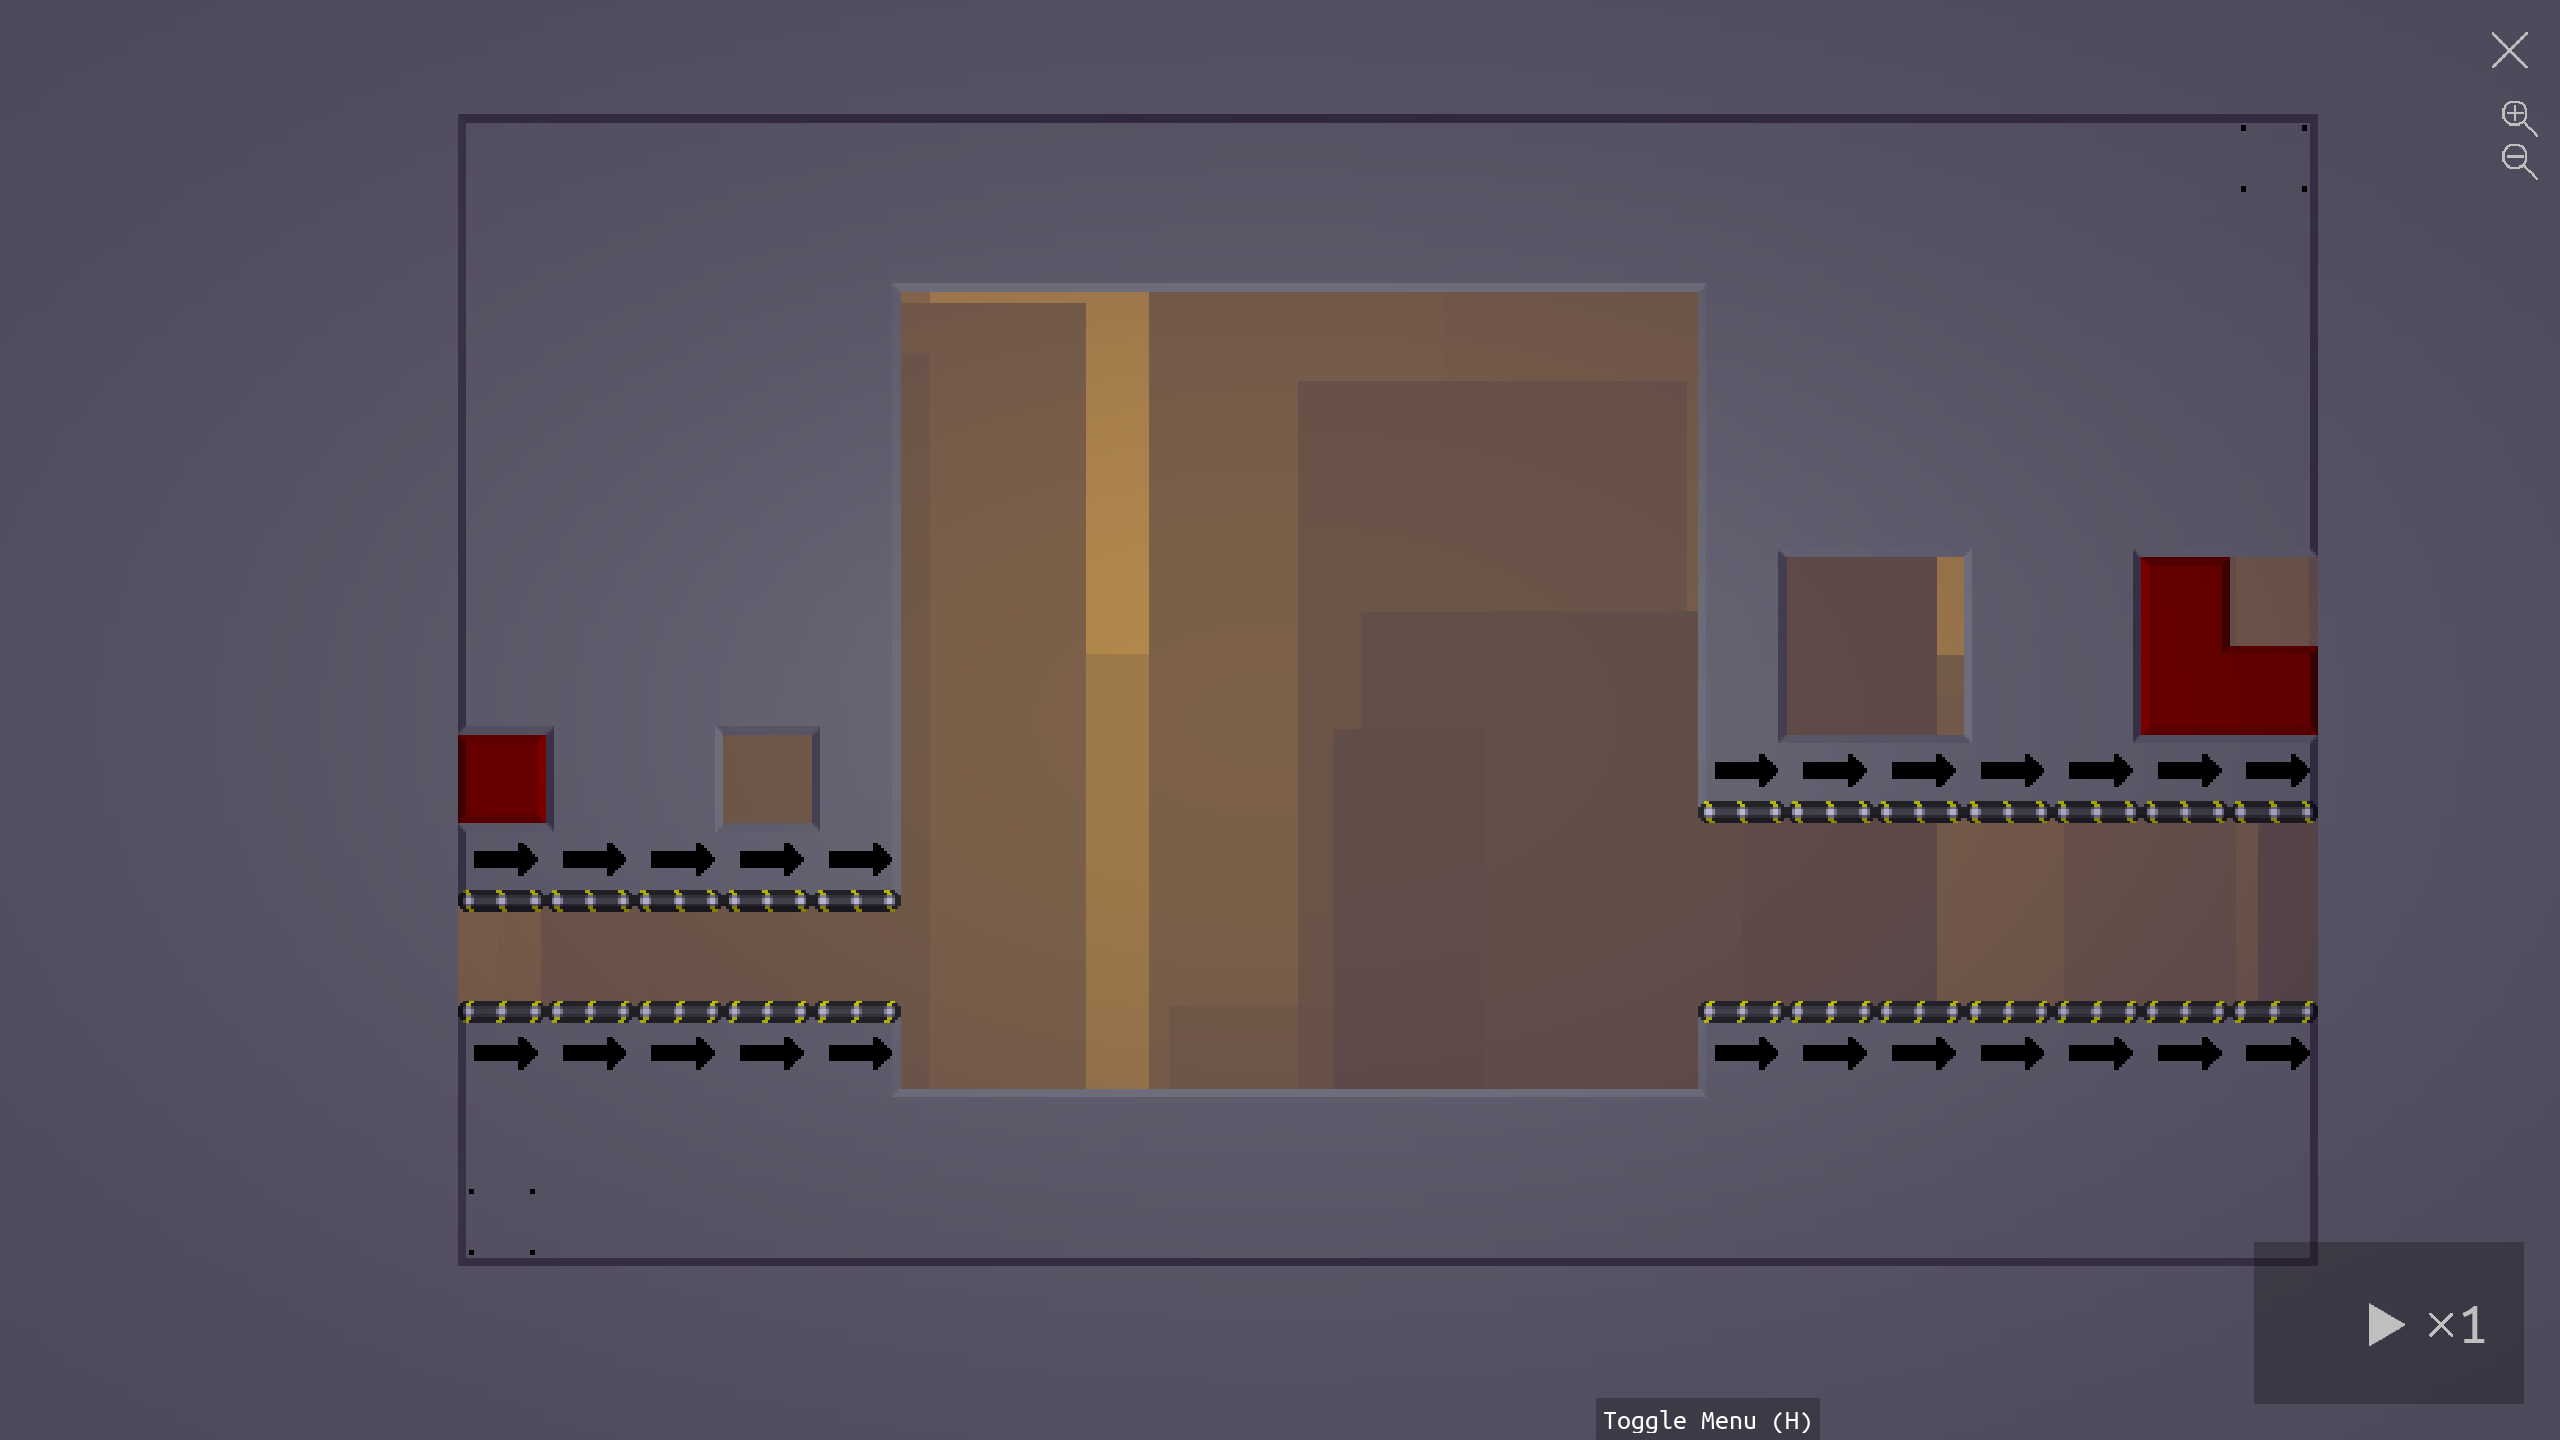
We can fill in the shapes we want to generate and check against in position 1 and position 4:
We now have finish building the physical part of our level.
Generators and checkers
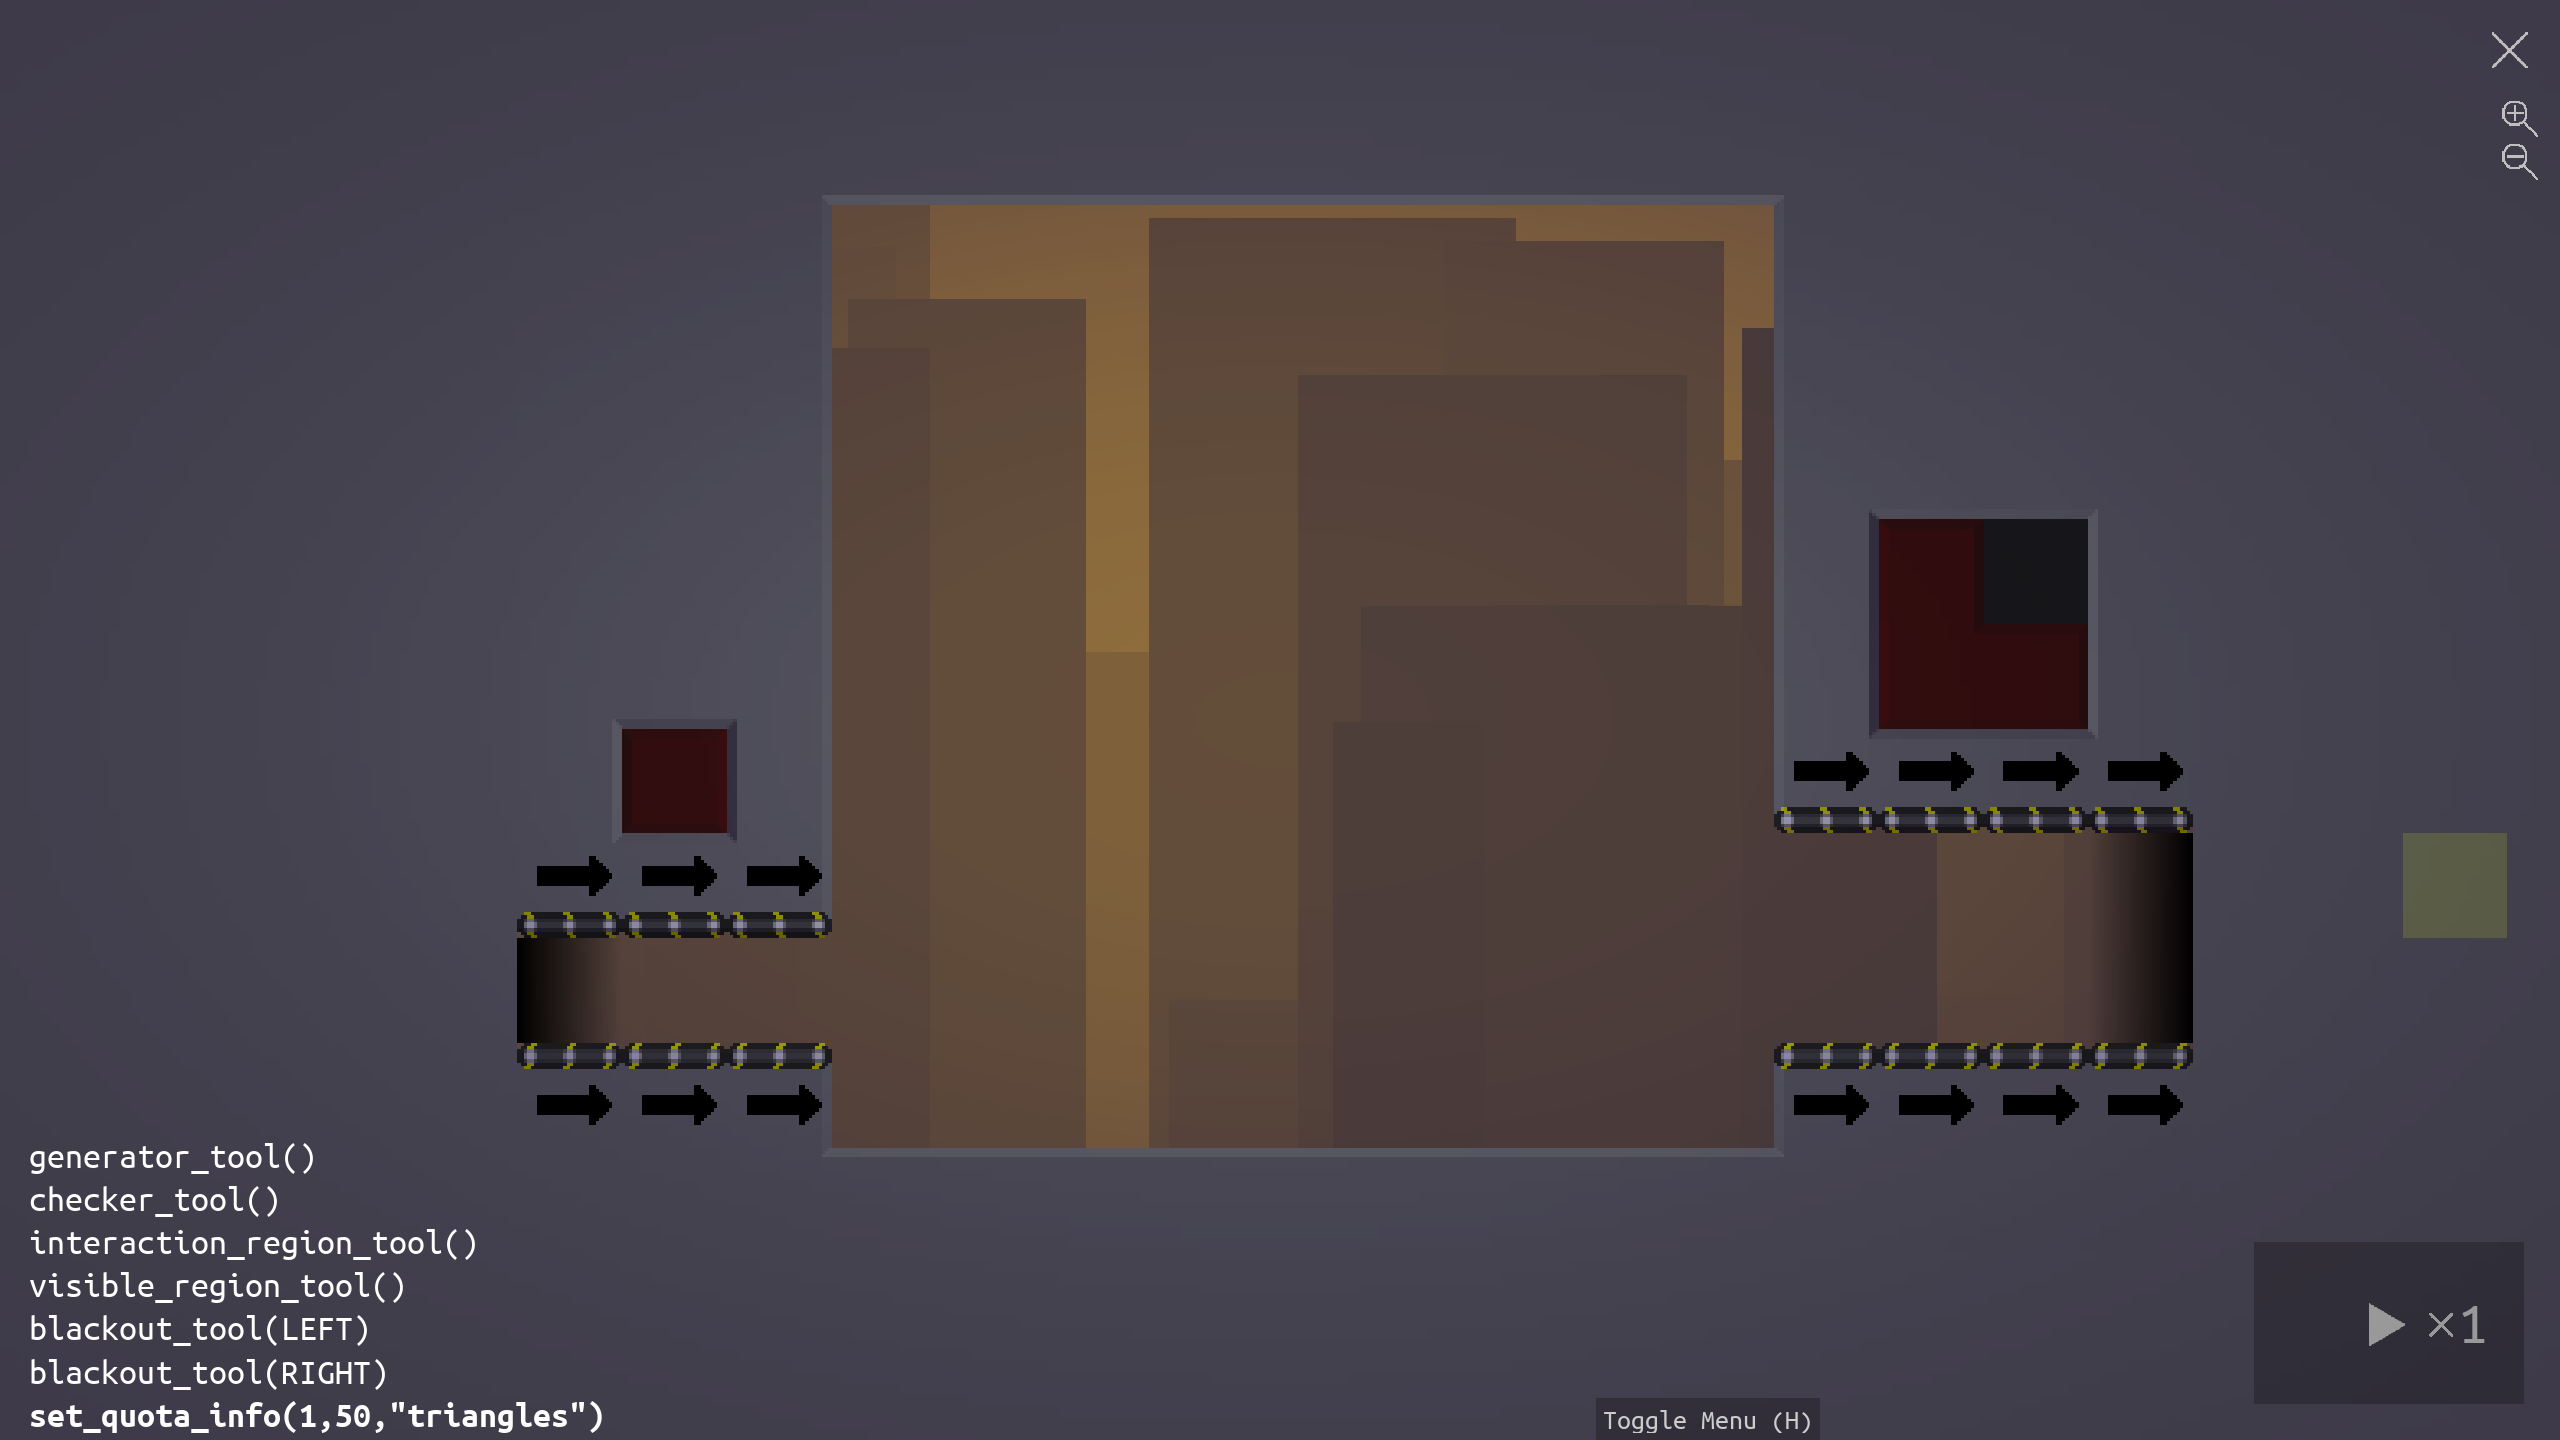
Next, we need to tell the game where we'd like to put generators and checkers. To do this, open the console by pressing the backtick button "`" on your keyboard (usually in the top left of a keyboard). This will darken the screen slightly and allow you to type commands into Warp Factory. Type generator_tool() into this window and hit Enter:
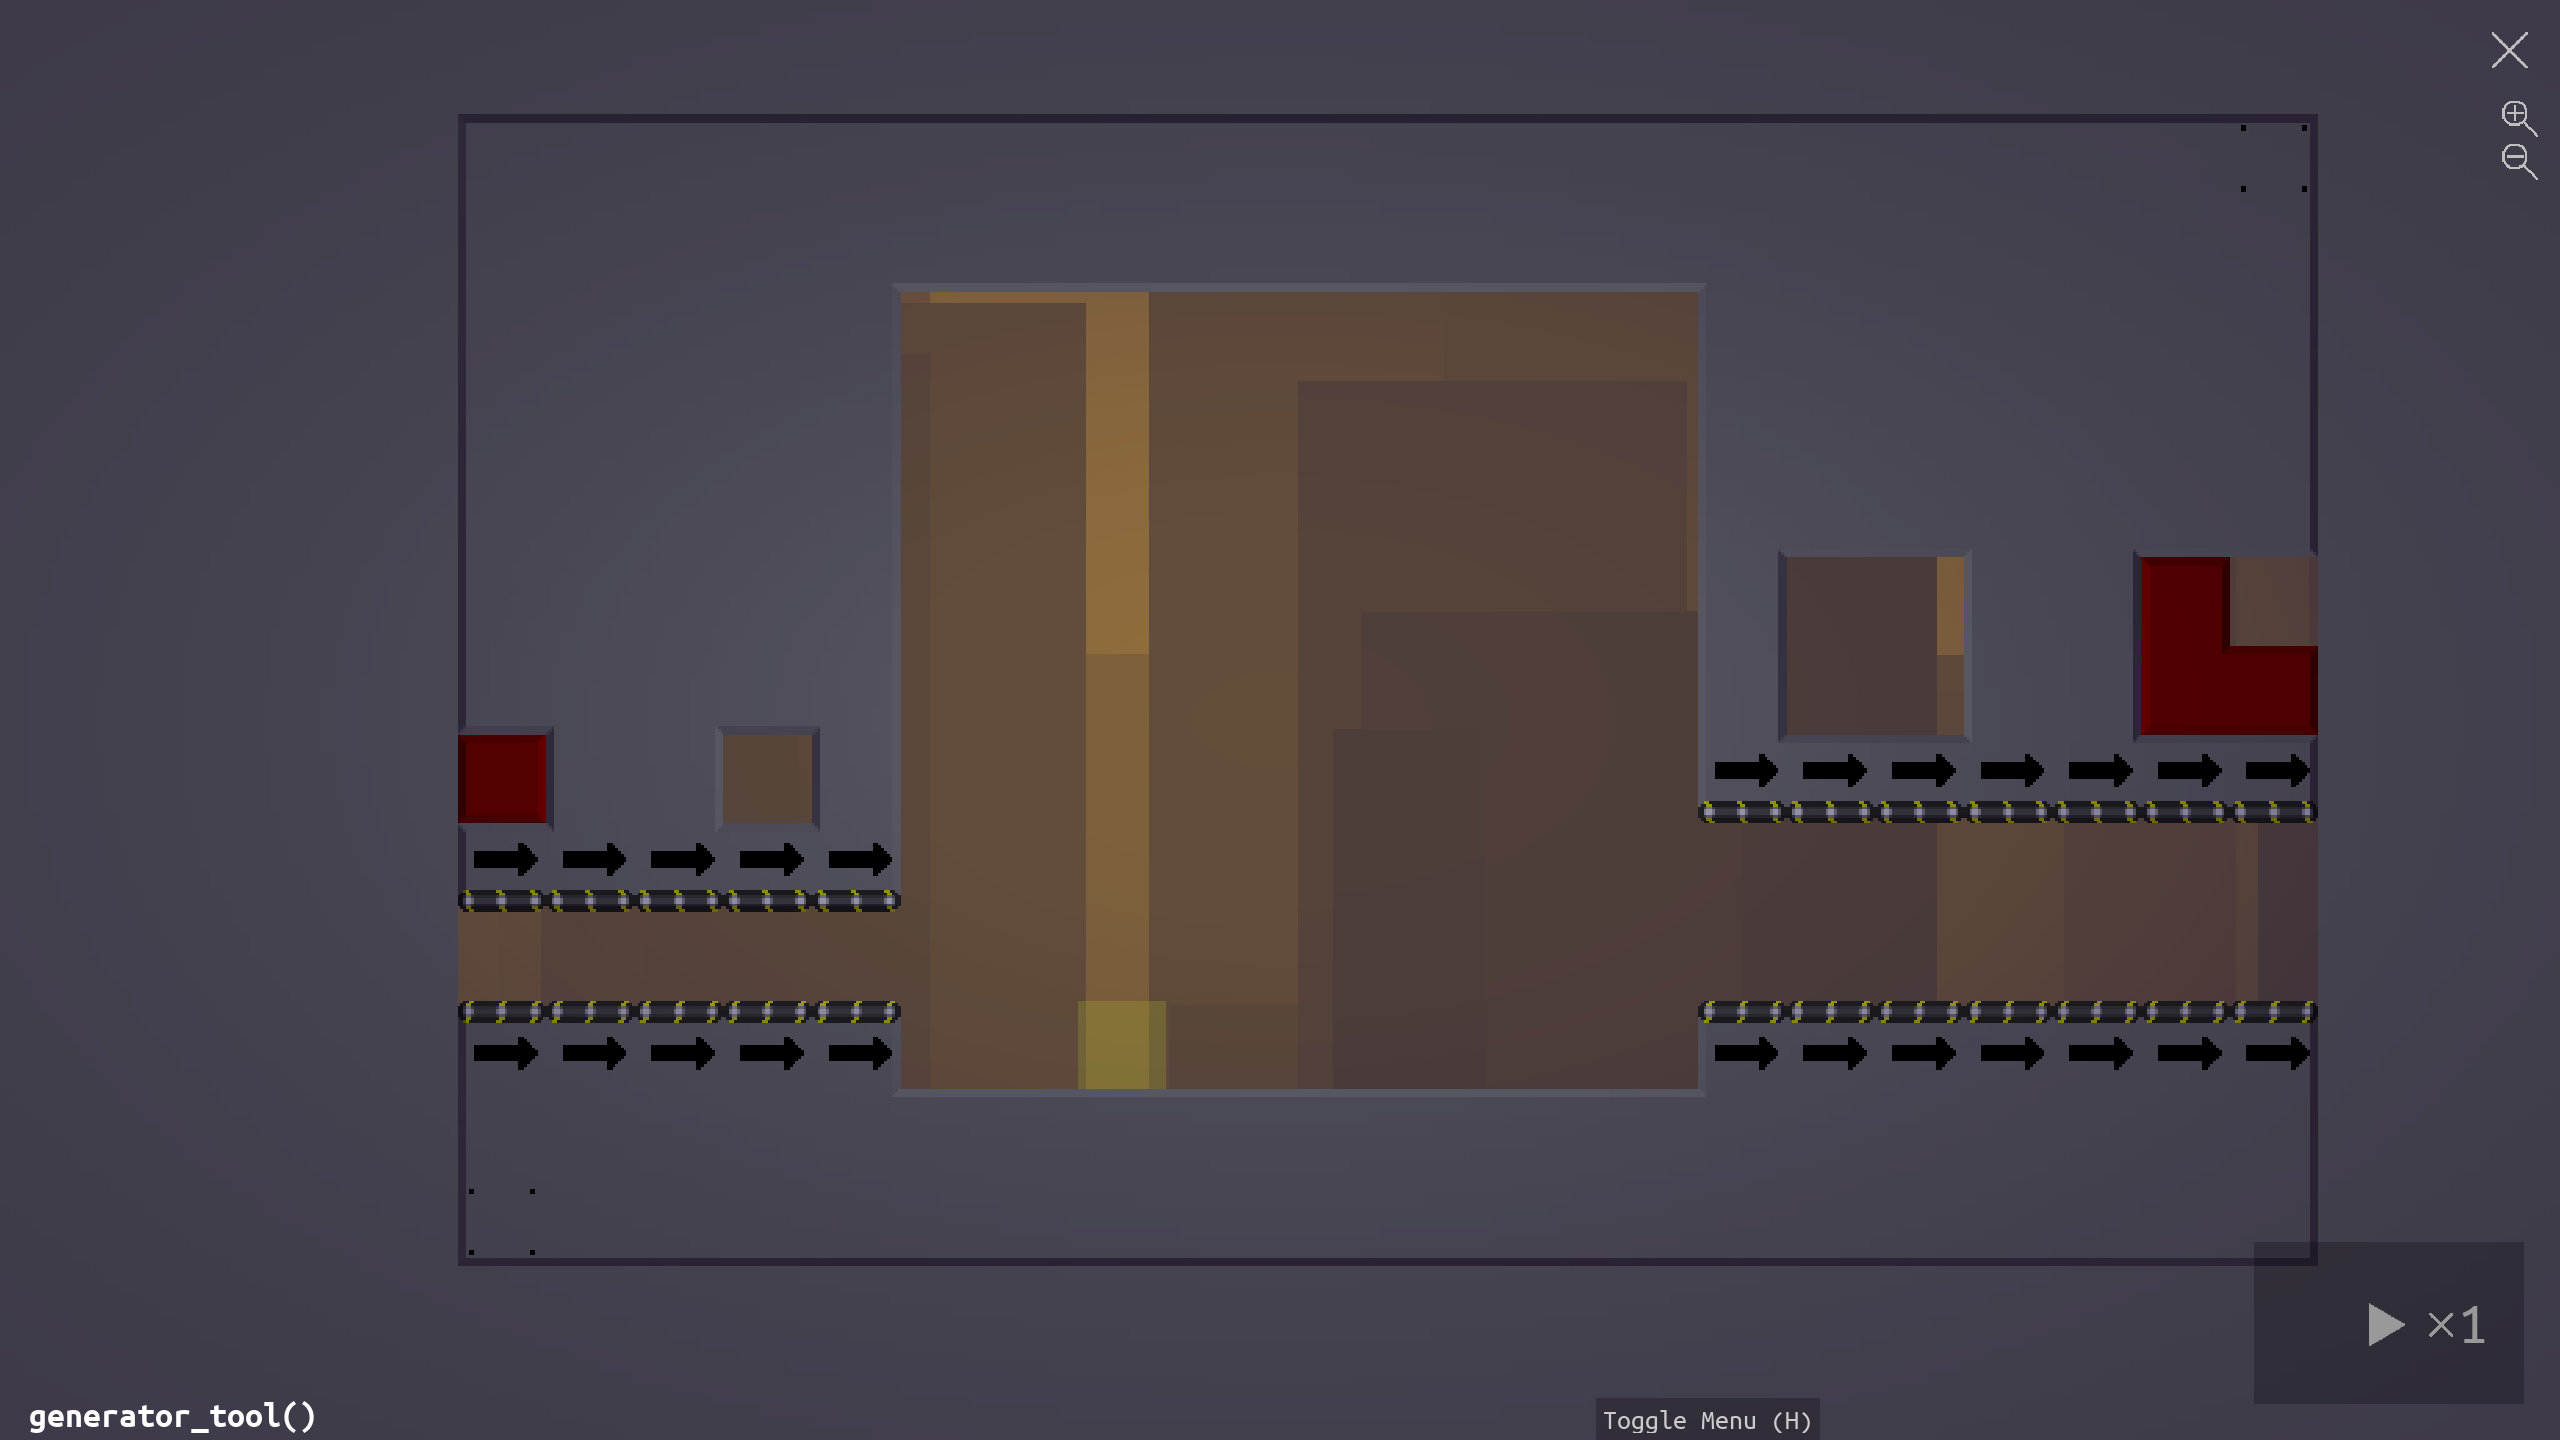
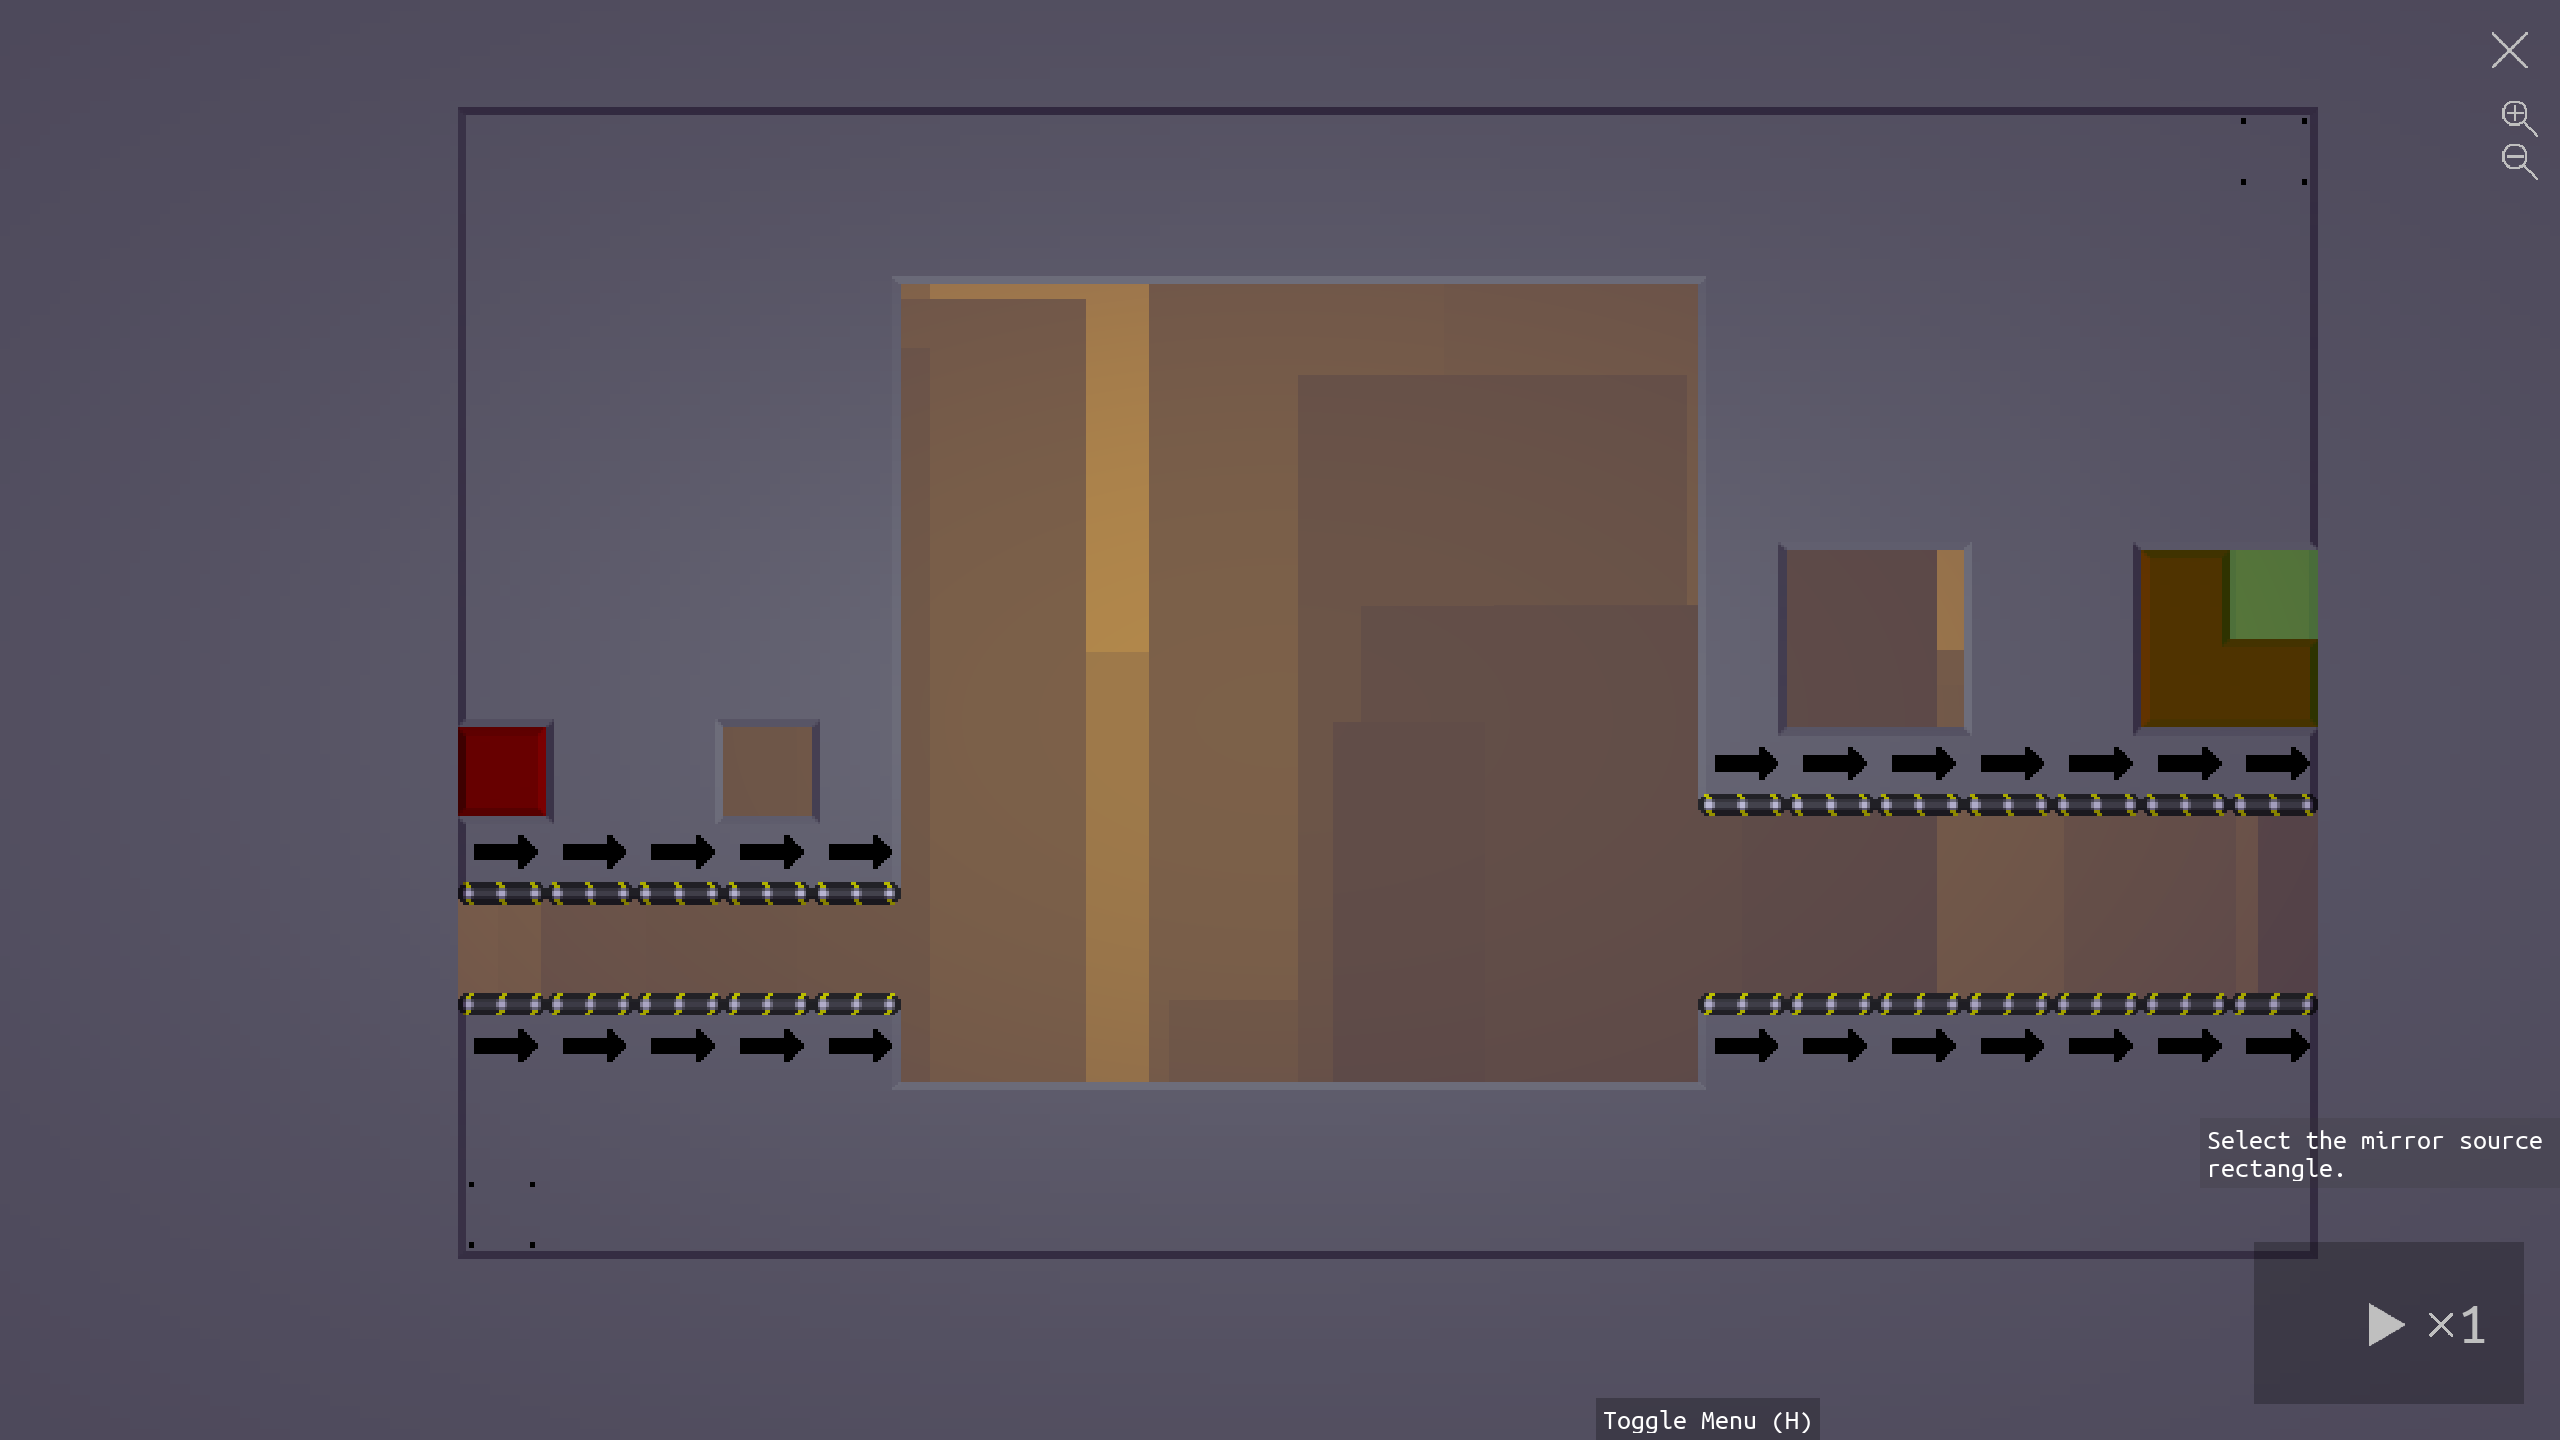
This will ask the game to open a special tool for creating generators. Press escape to close the console. You will be prompted to select the mirror source rectangle.
To select a rectangle, simply click and drag over the region you want. You can right click to cancel the whole interaction if you mess up. In this case, we just need to select 1 x 1 rectangles, so we can just click where we want. Once you've selected a mirror source, it will ask for the mirror target, then the generate rectangle. Click on the respective positions for these (positions 1, 2, and 3 in the labeled diagram).
Next, open the console again and type checker_tool(). Close the console. This tool will prompt you to select the mirror source, mirror target, check, and dispose rectangles for the checker (positions 4, 5, 6, and 7 in the diagram). Each of these needs to be a 2 x 2 rectangle.
Once you've done this, run the level. Nothing will happen, but when you stop the level, it will reload, and the checker and generator will be set up - and if we play the level again, we will see that the level is now working as intended.
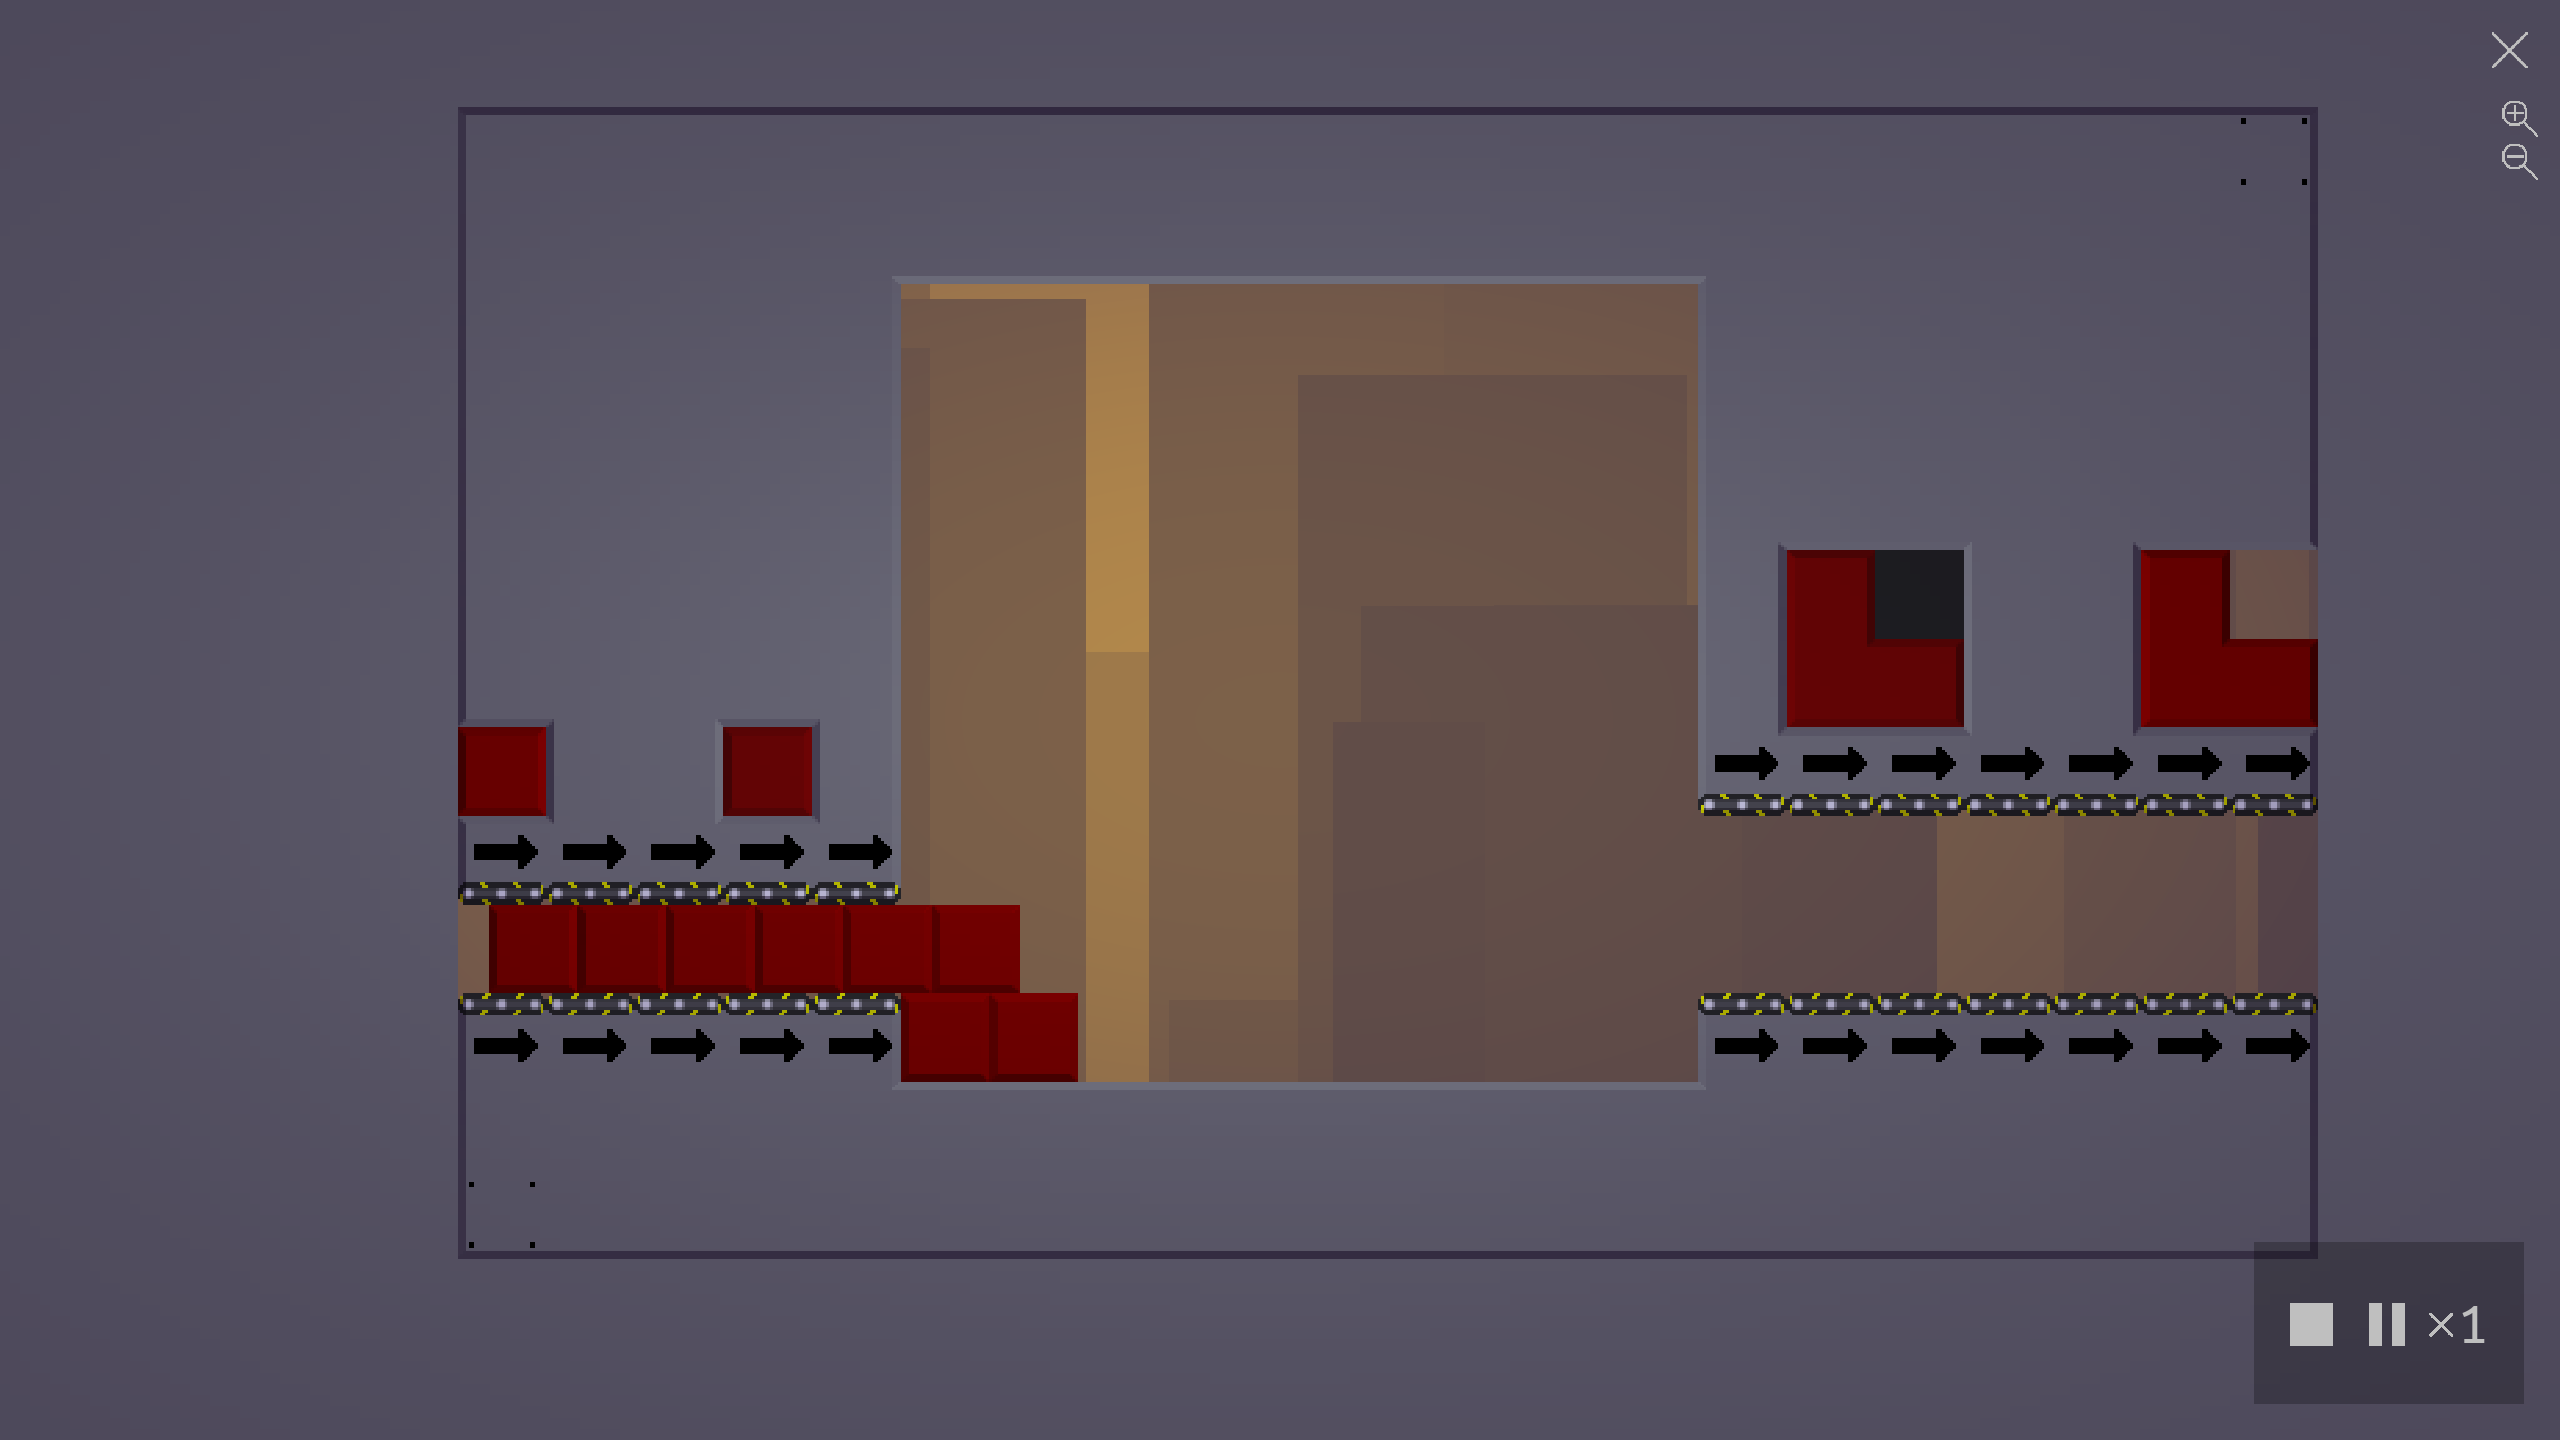
It's usually a good idea to stop here to ensure that your level works as intended. It's even advisable to stop at this stage and solve the level to make sure that the level is actually possible.
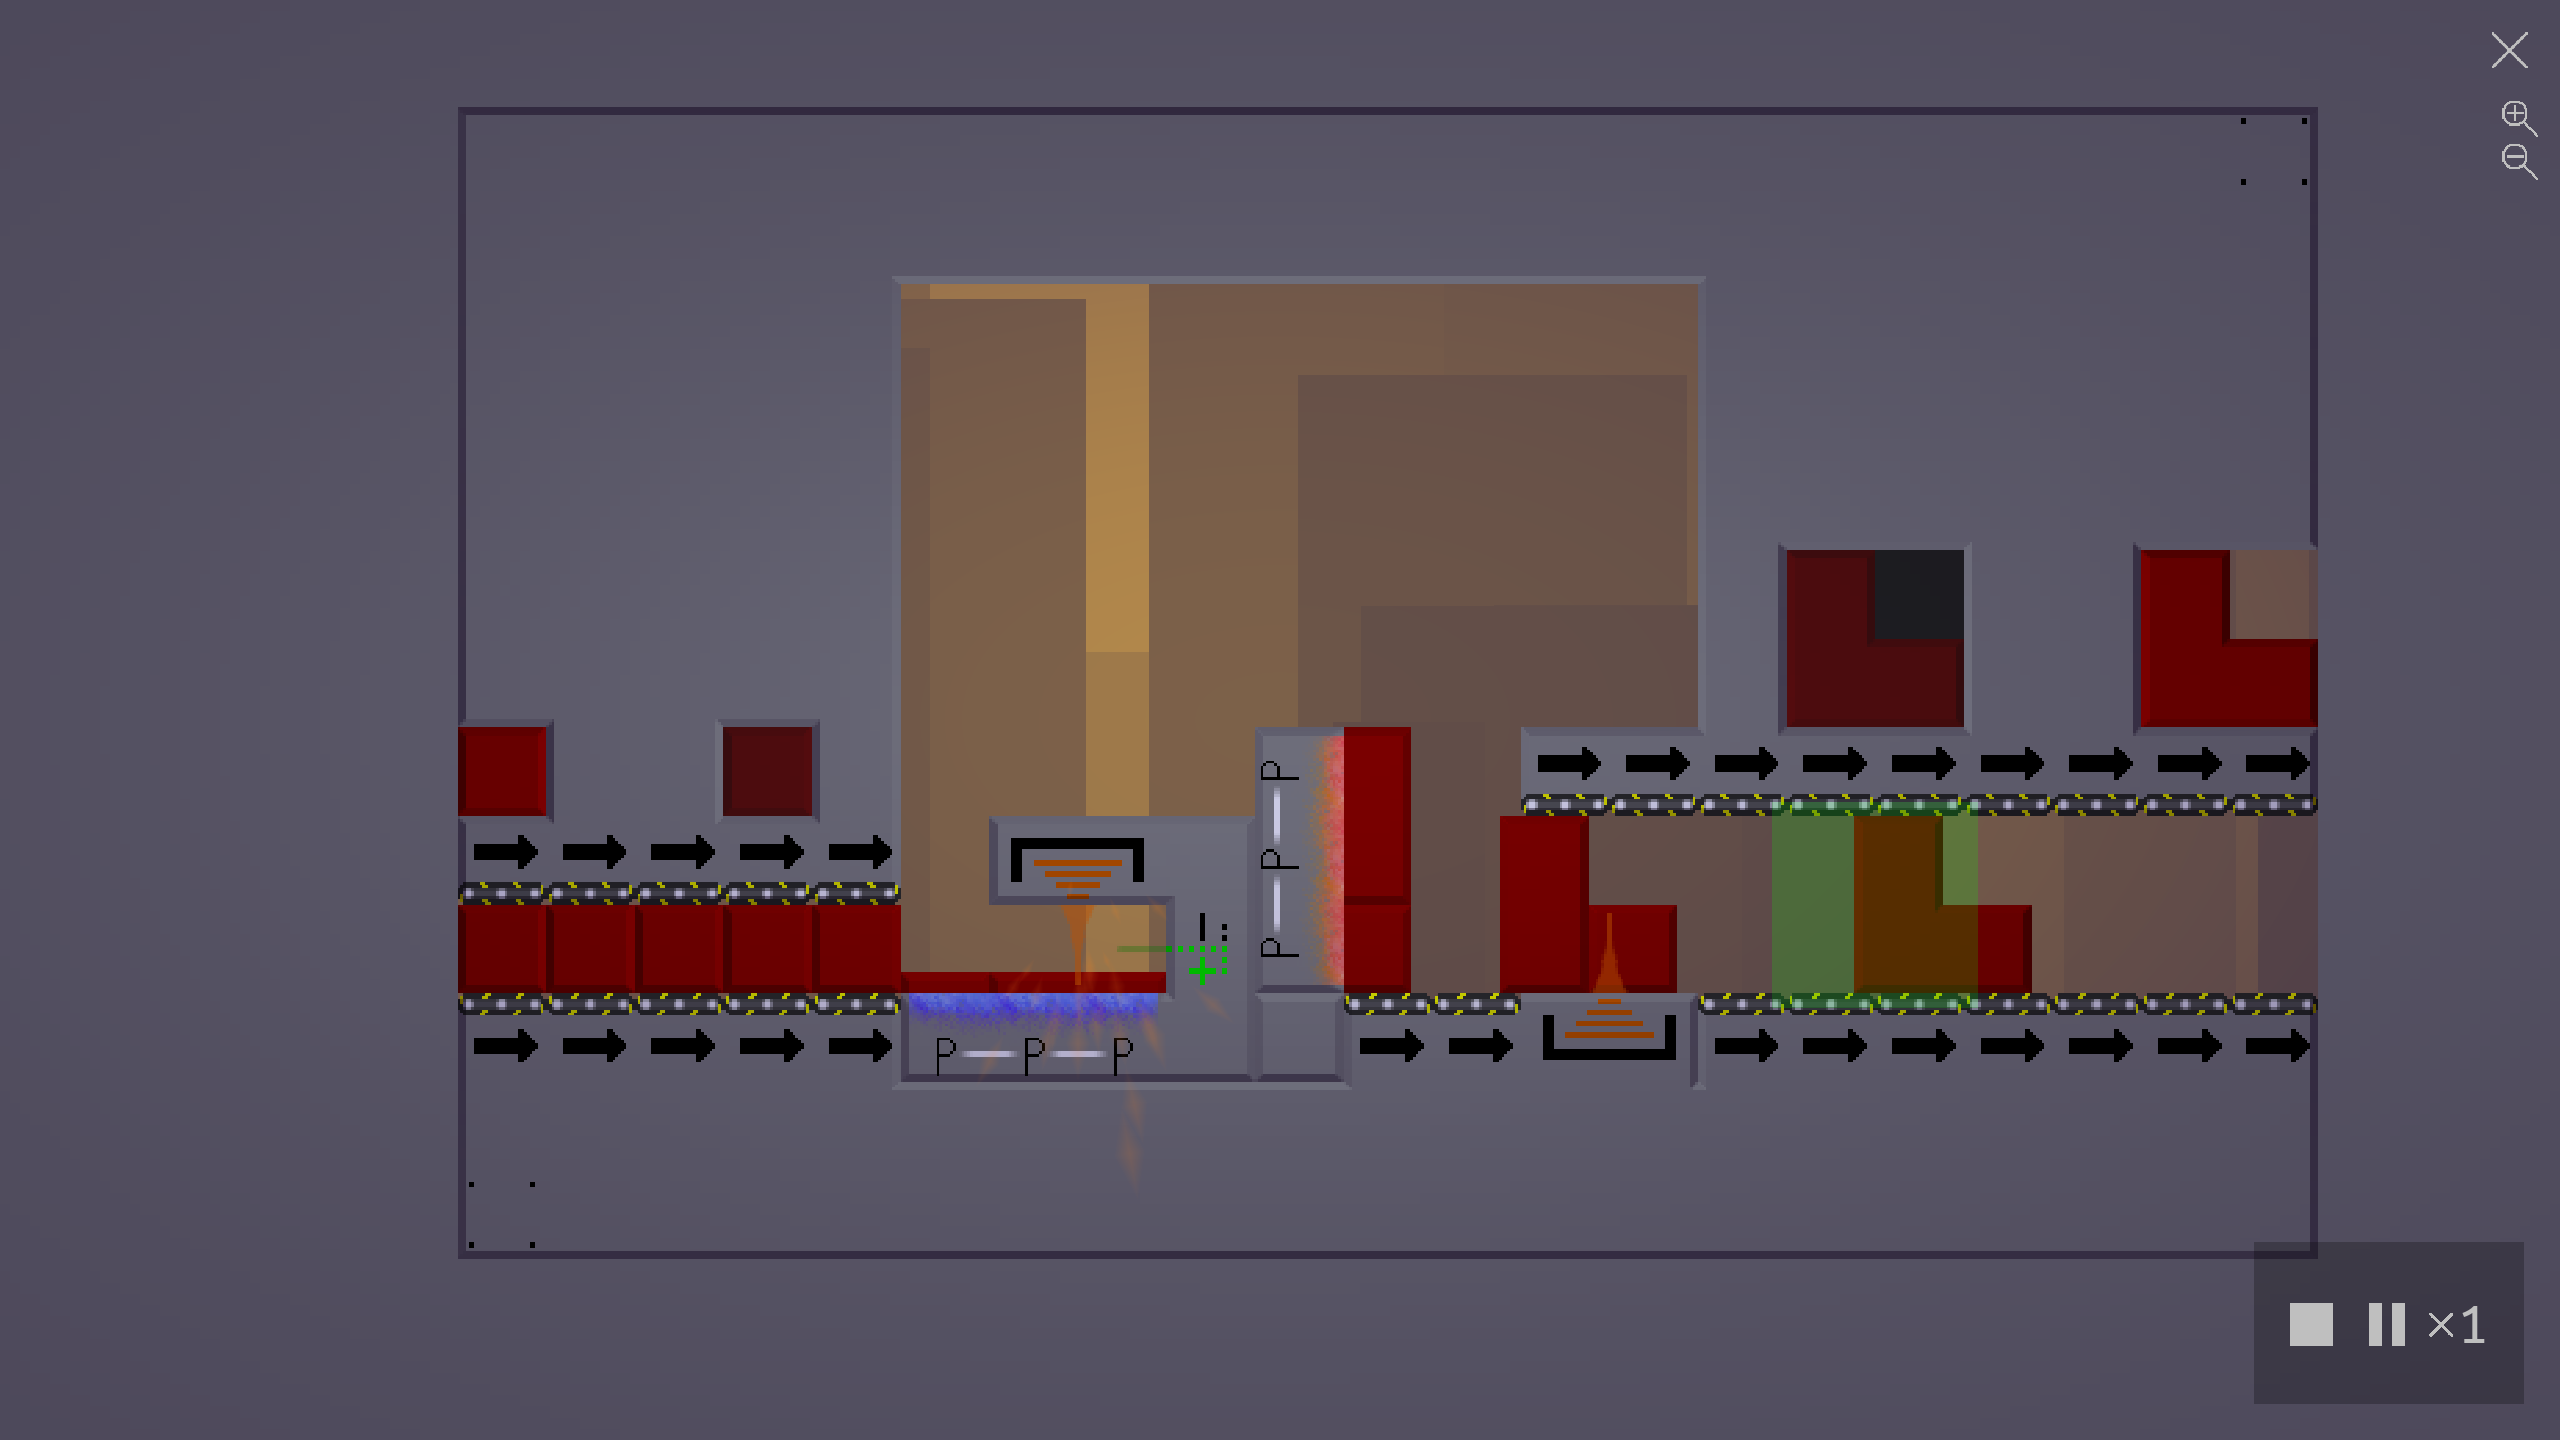
Cosmetics and Win Conditions
Once we are satisfied the level is as we want, we can finish by setting an interaction region (to restrict where the player can change things), a visible region (to restrict what the player can see), and setting up the quotas for the level (to generate a win condition for the level). We can also apply cosmetic changes like blackouts, which generally signal where inputs and outputs are expected.
To set the interaction region, we use the command interaction_region_tool() in the console and then click and drag the region we want the player to be able to modify.
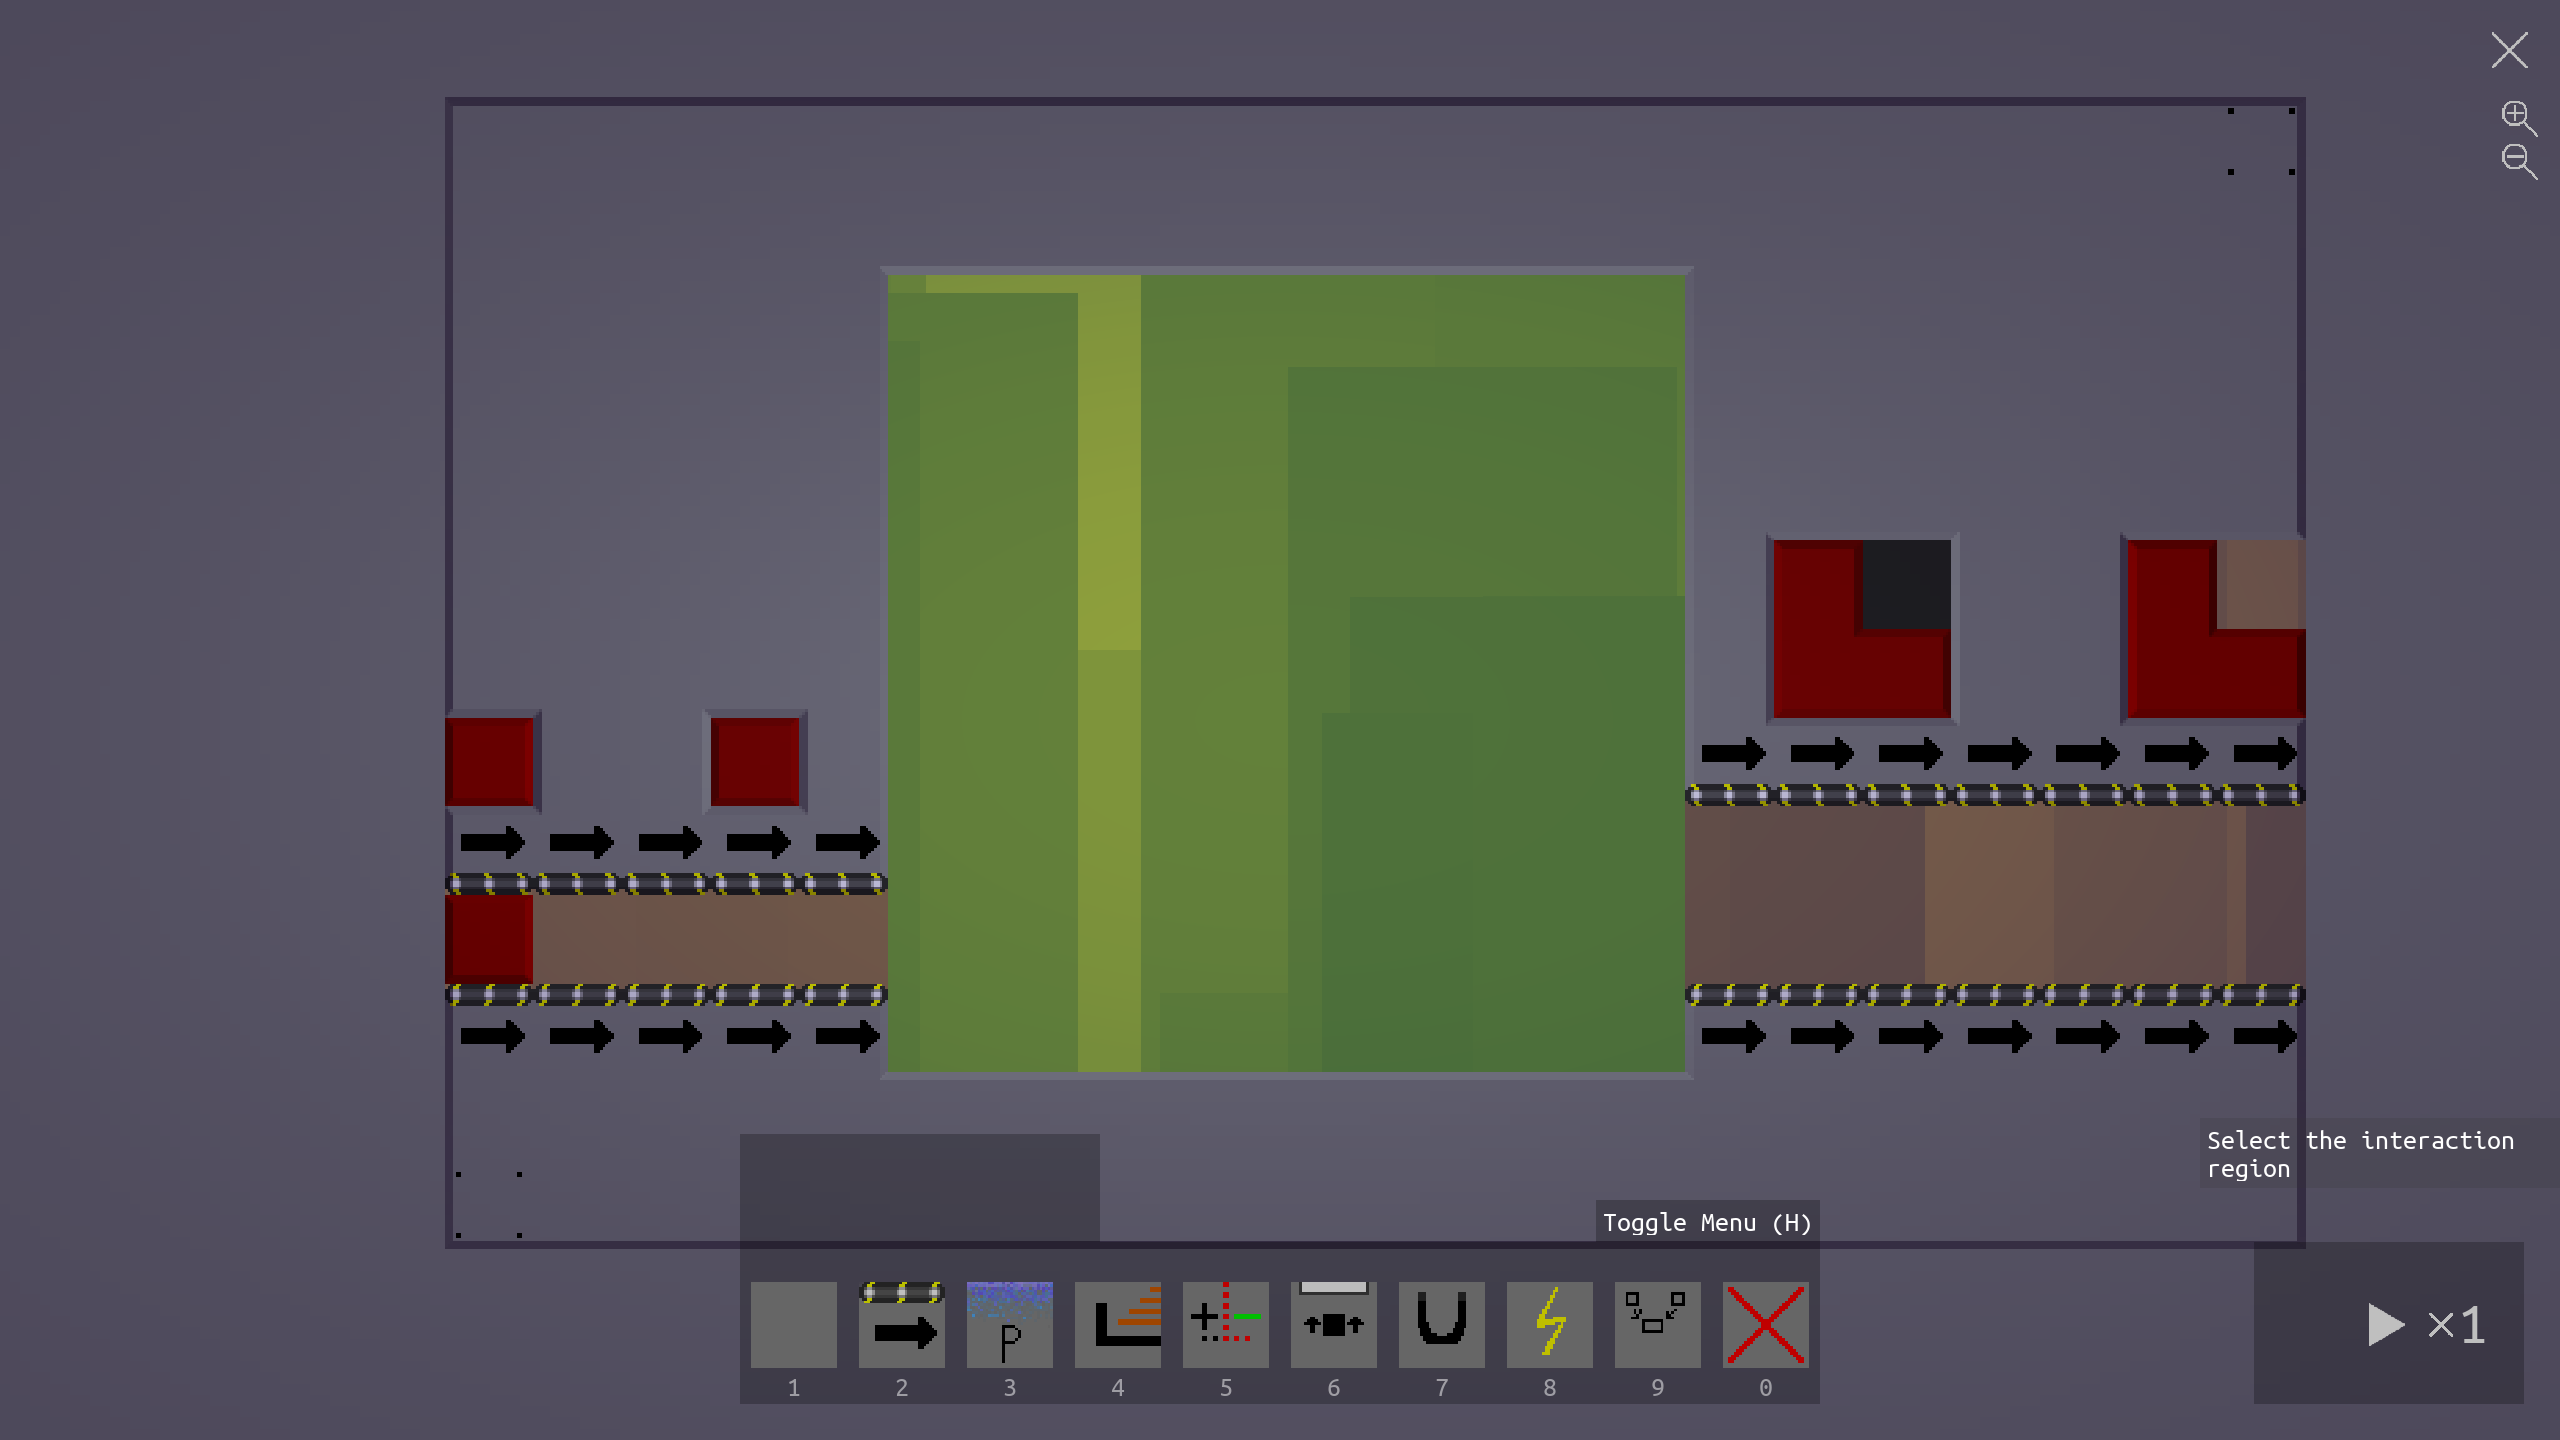
Similarly, we can set up the visible region with the command visible_region_tool()
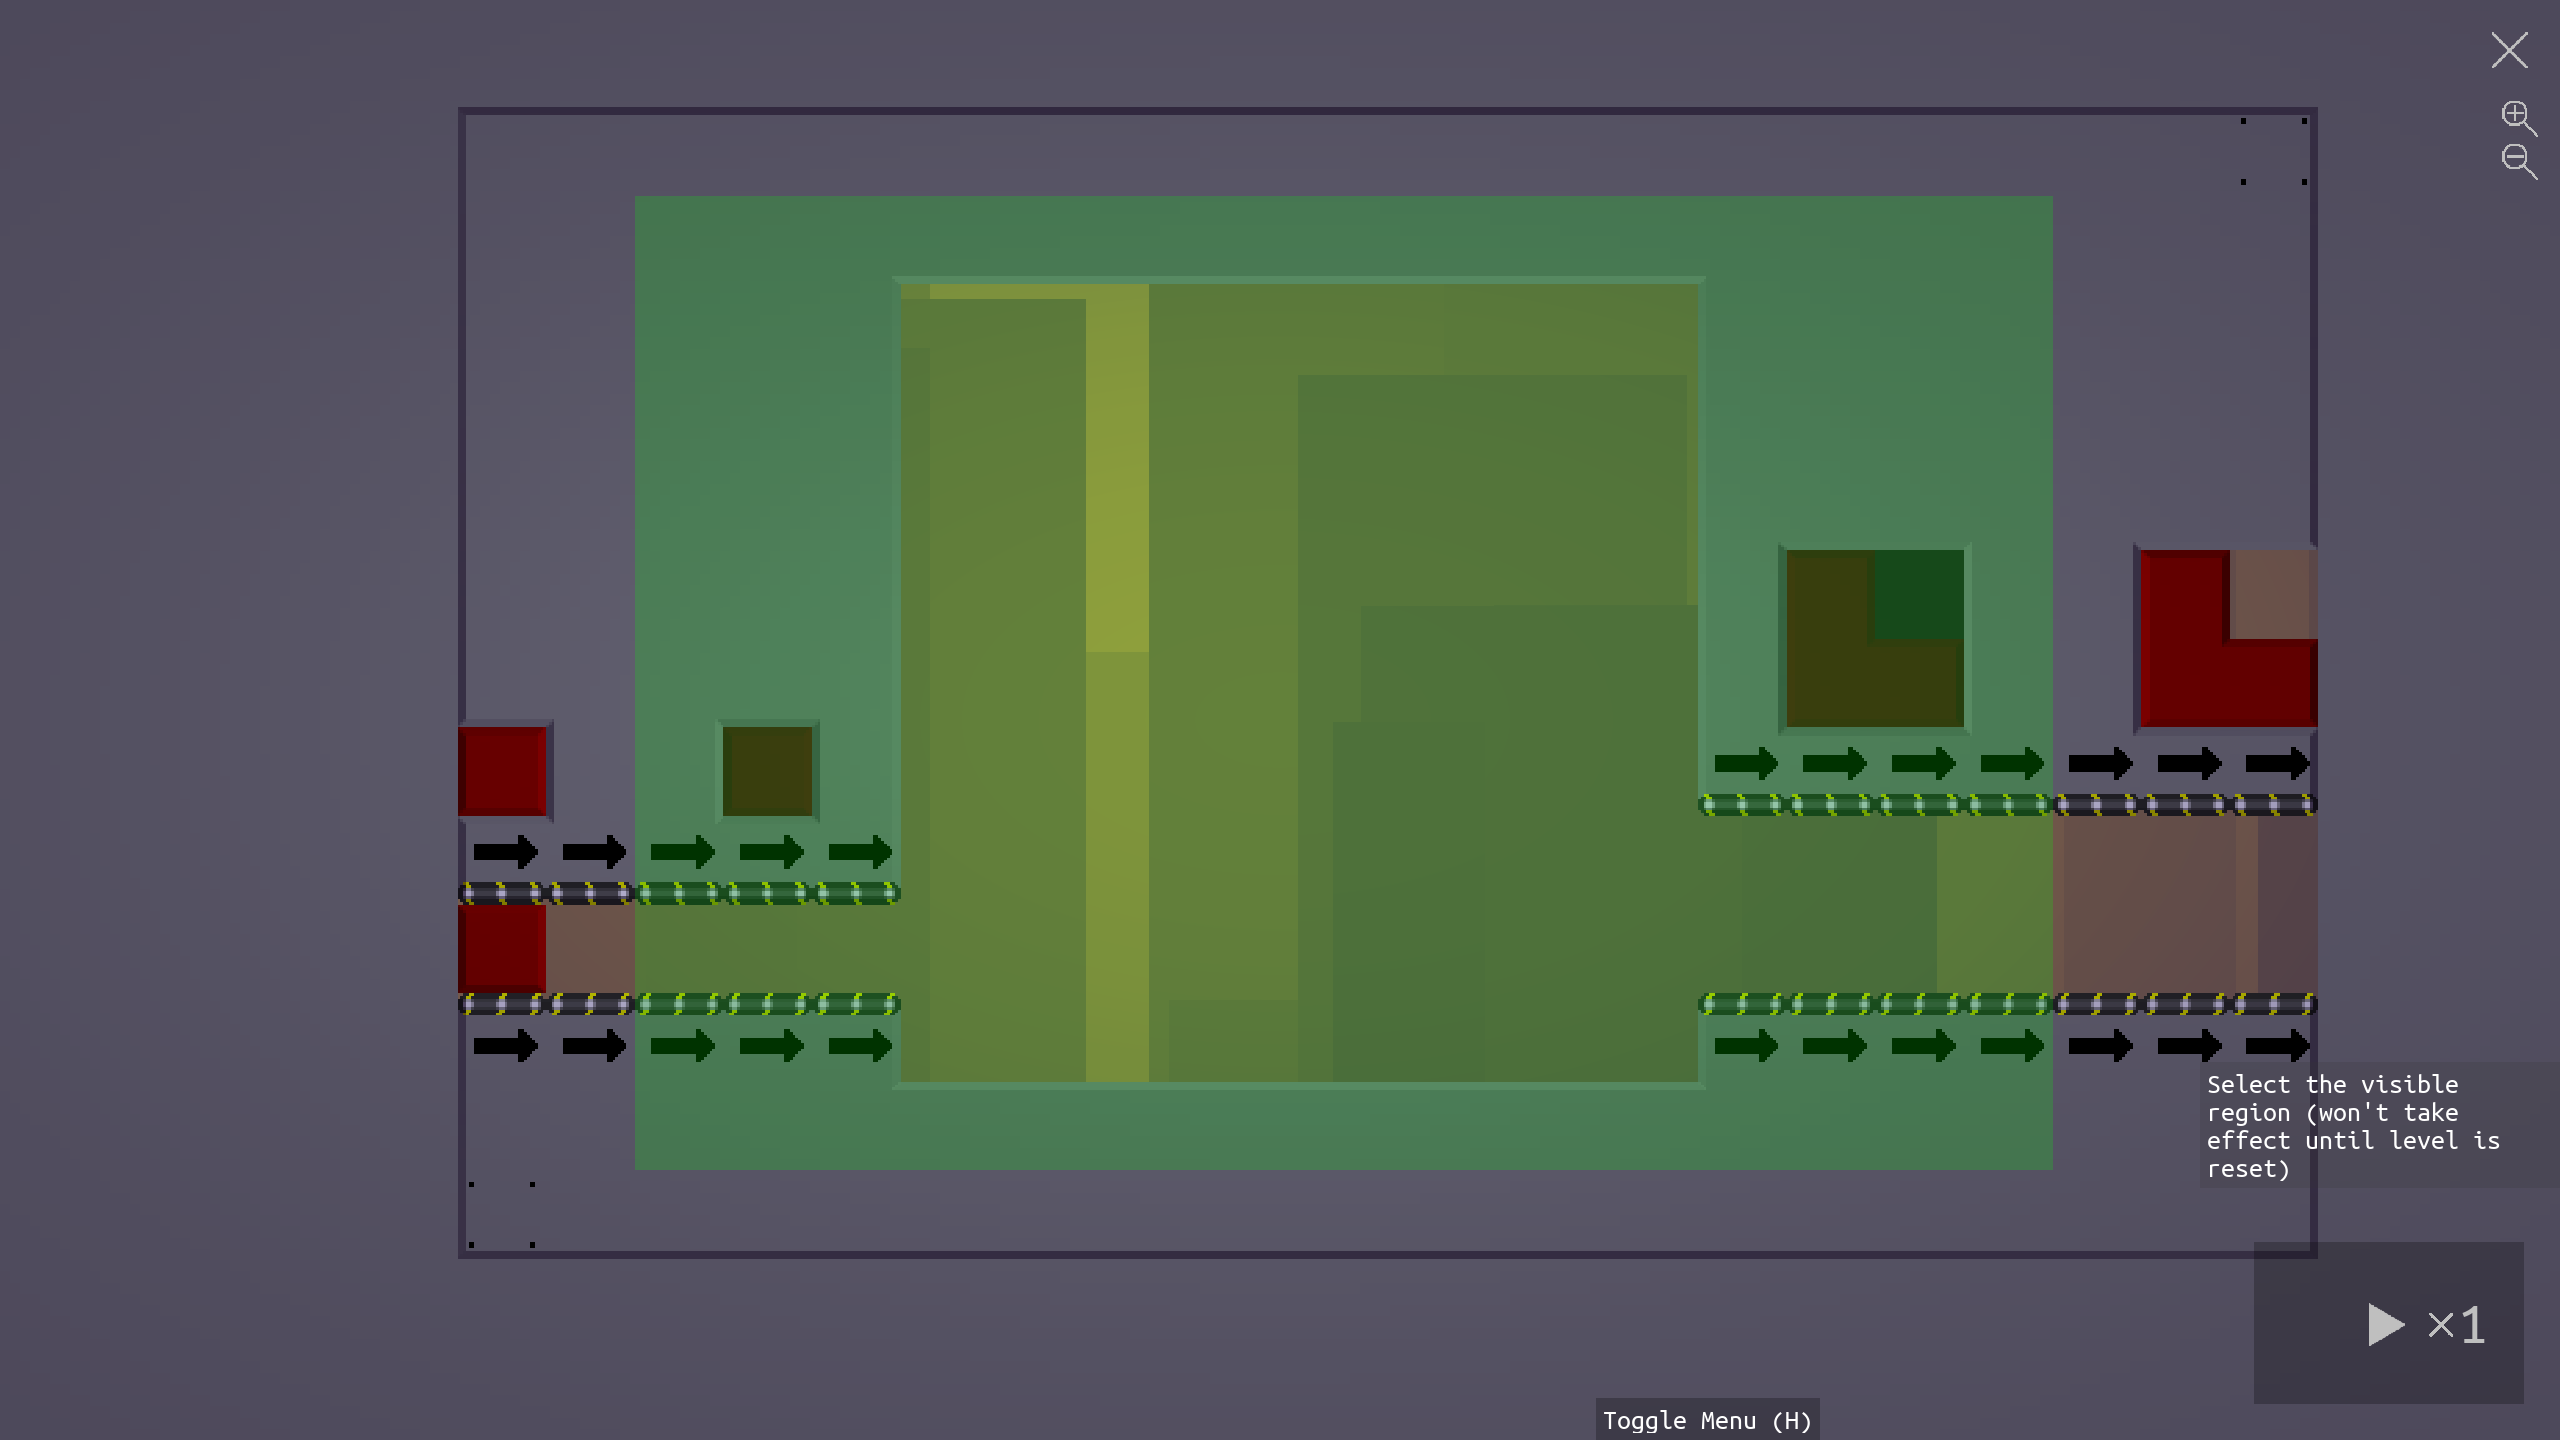
We will need to refresh the game for either of these to take effect; this can be done by running the level and then stopping it. Once we've done that, we'll see only the restricted part of the level:
The game will also disallow interactions outside of the previously selected region at this point.
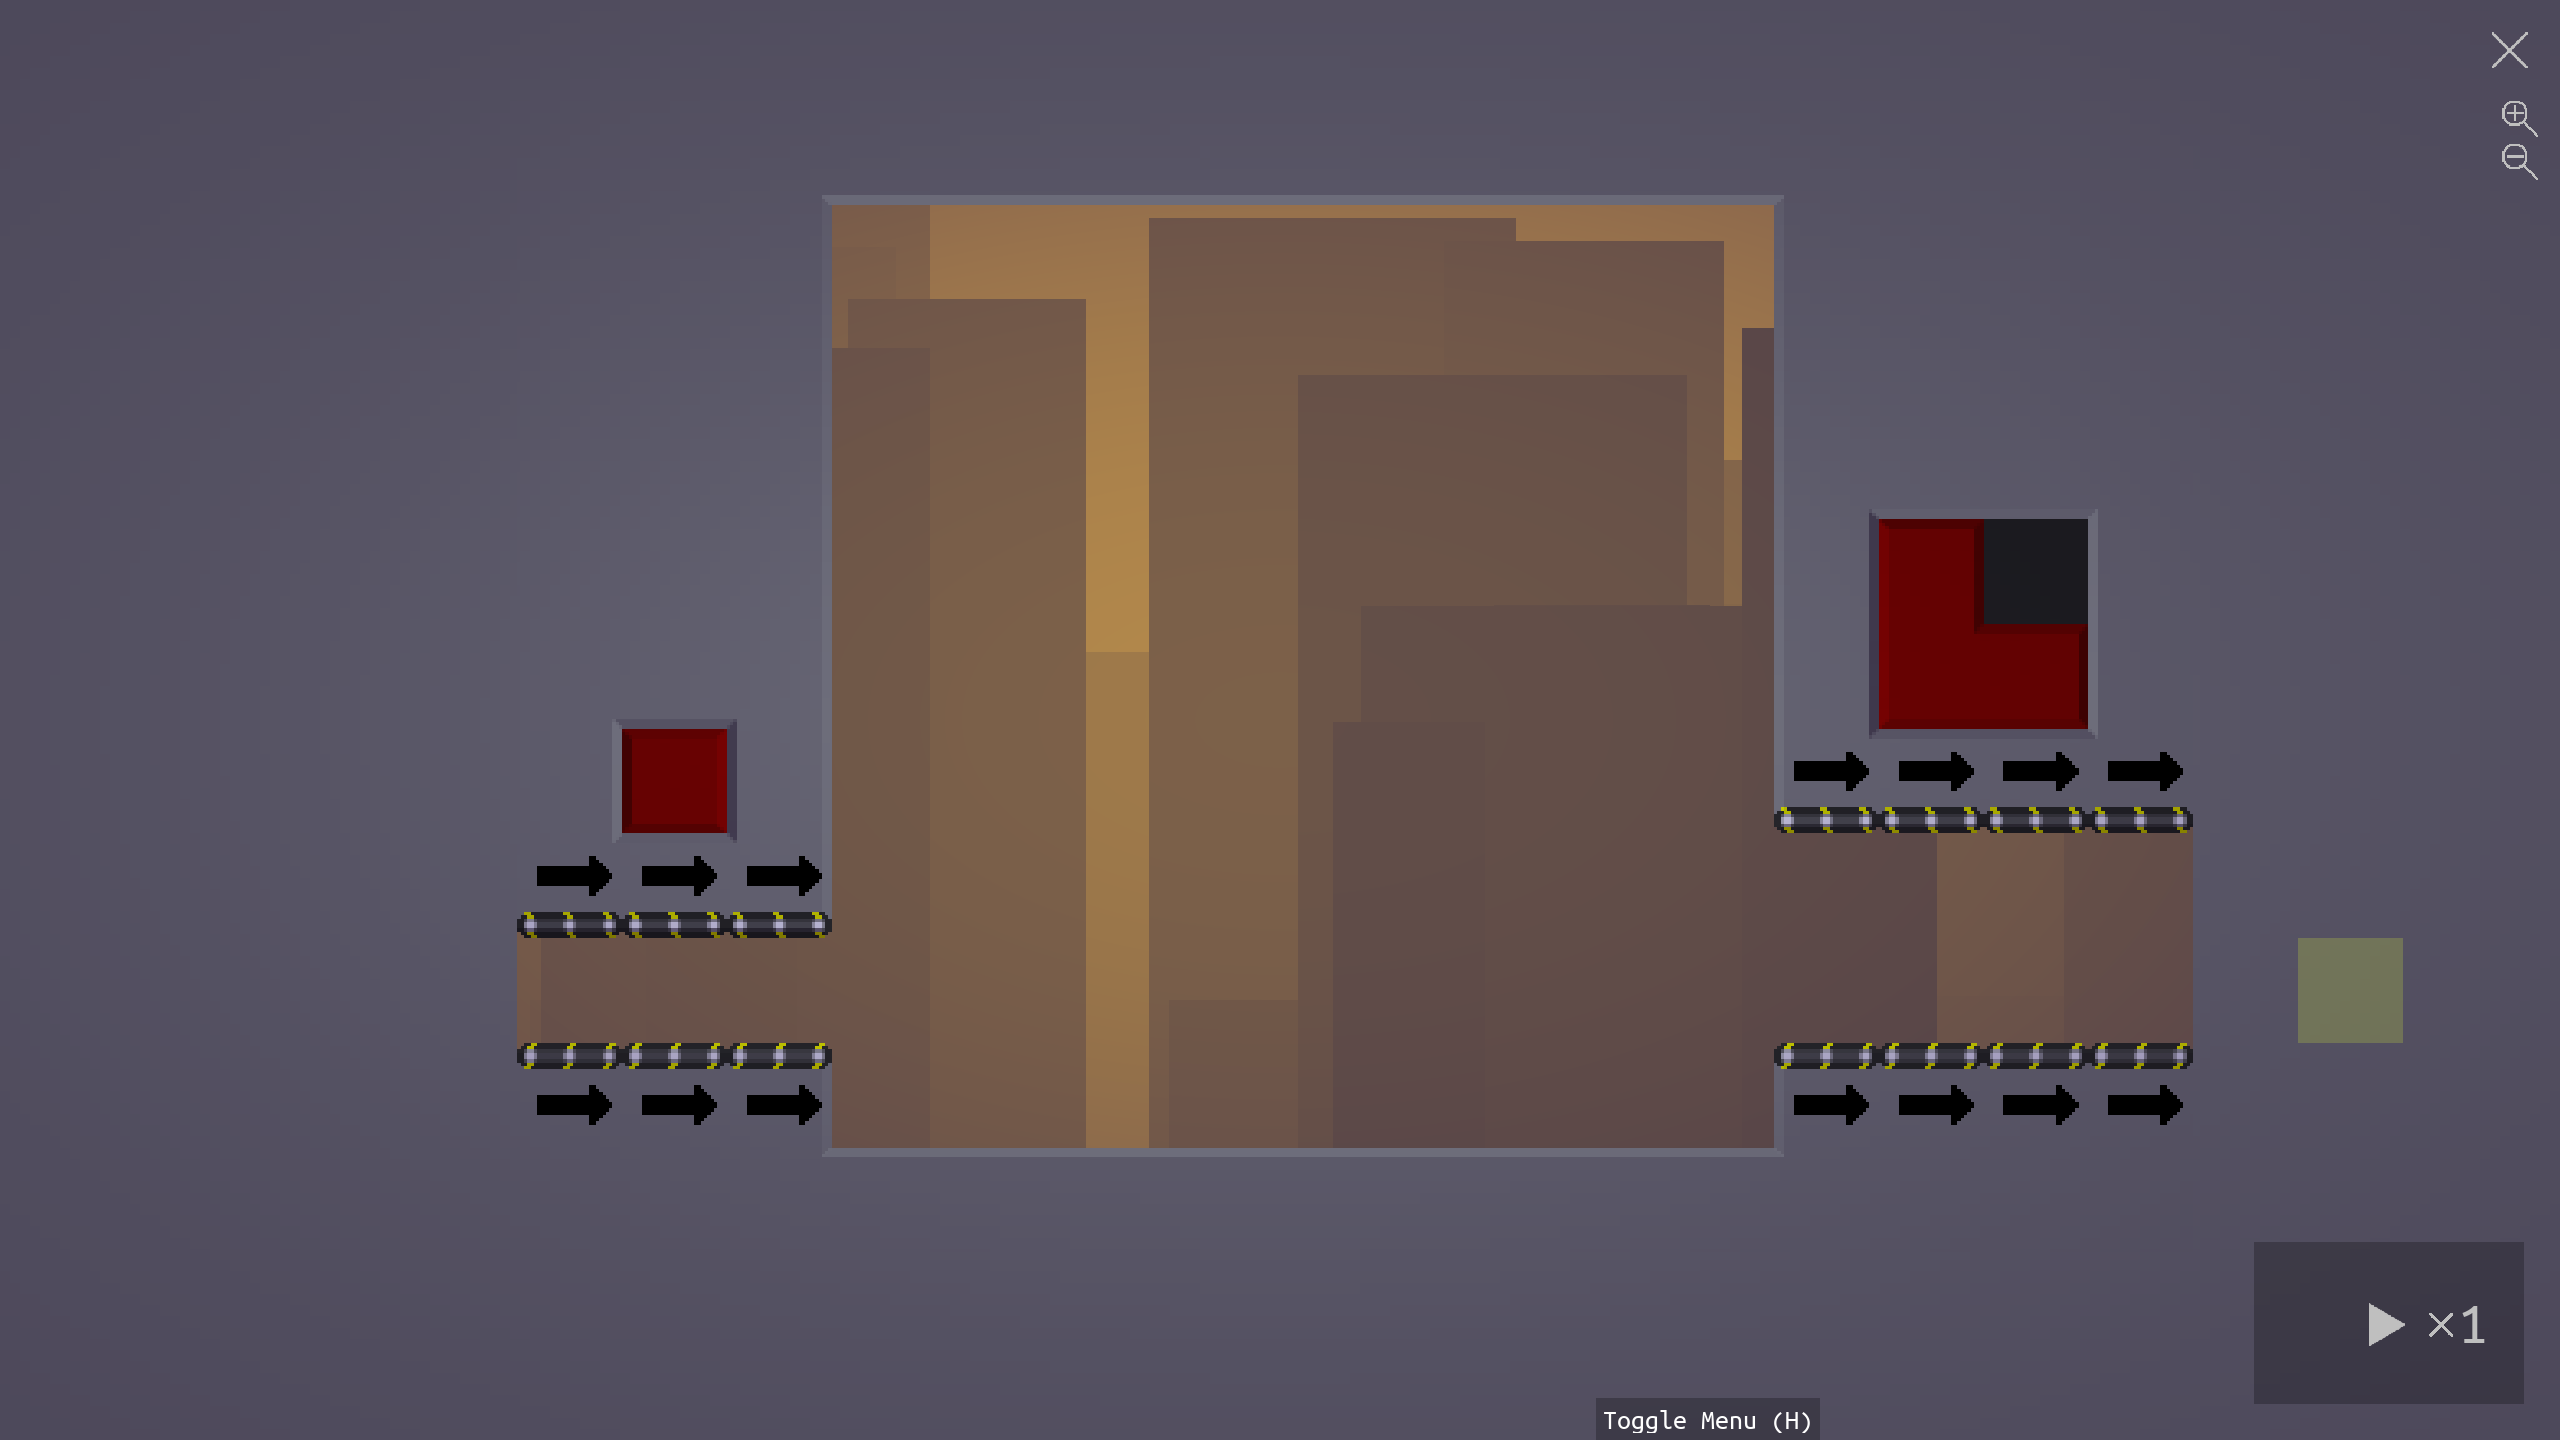
The inputs and outputs look a bit awkward at the moment, since they just end at the edge of the visible region. Levels in the campaign style this by using a fade in and fade out effect on the edges. This can be created by writing blackout_tool(LEFT) and then selecting a 1 x 1 rectangle on the left for the fade effect, and using blackout_tool(RIGHT) and selecting a 1 x 2 rectangle on the right. After refreshing the level, we'll see the effects applied.
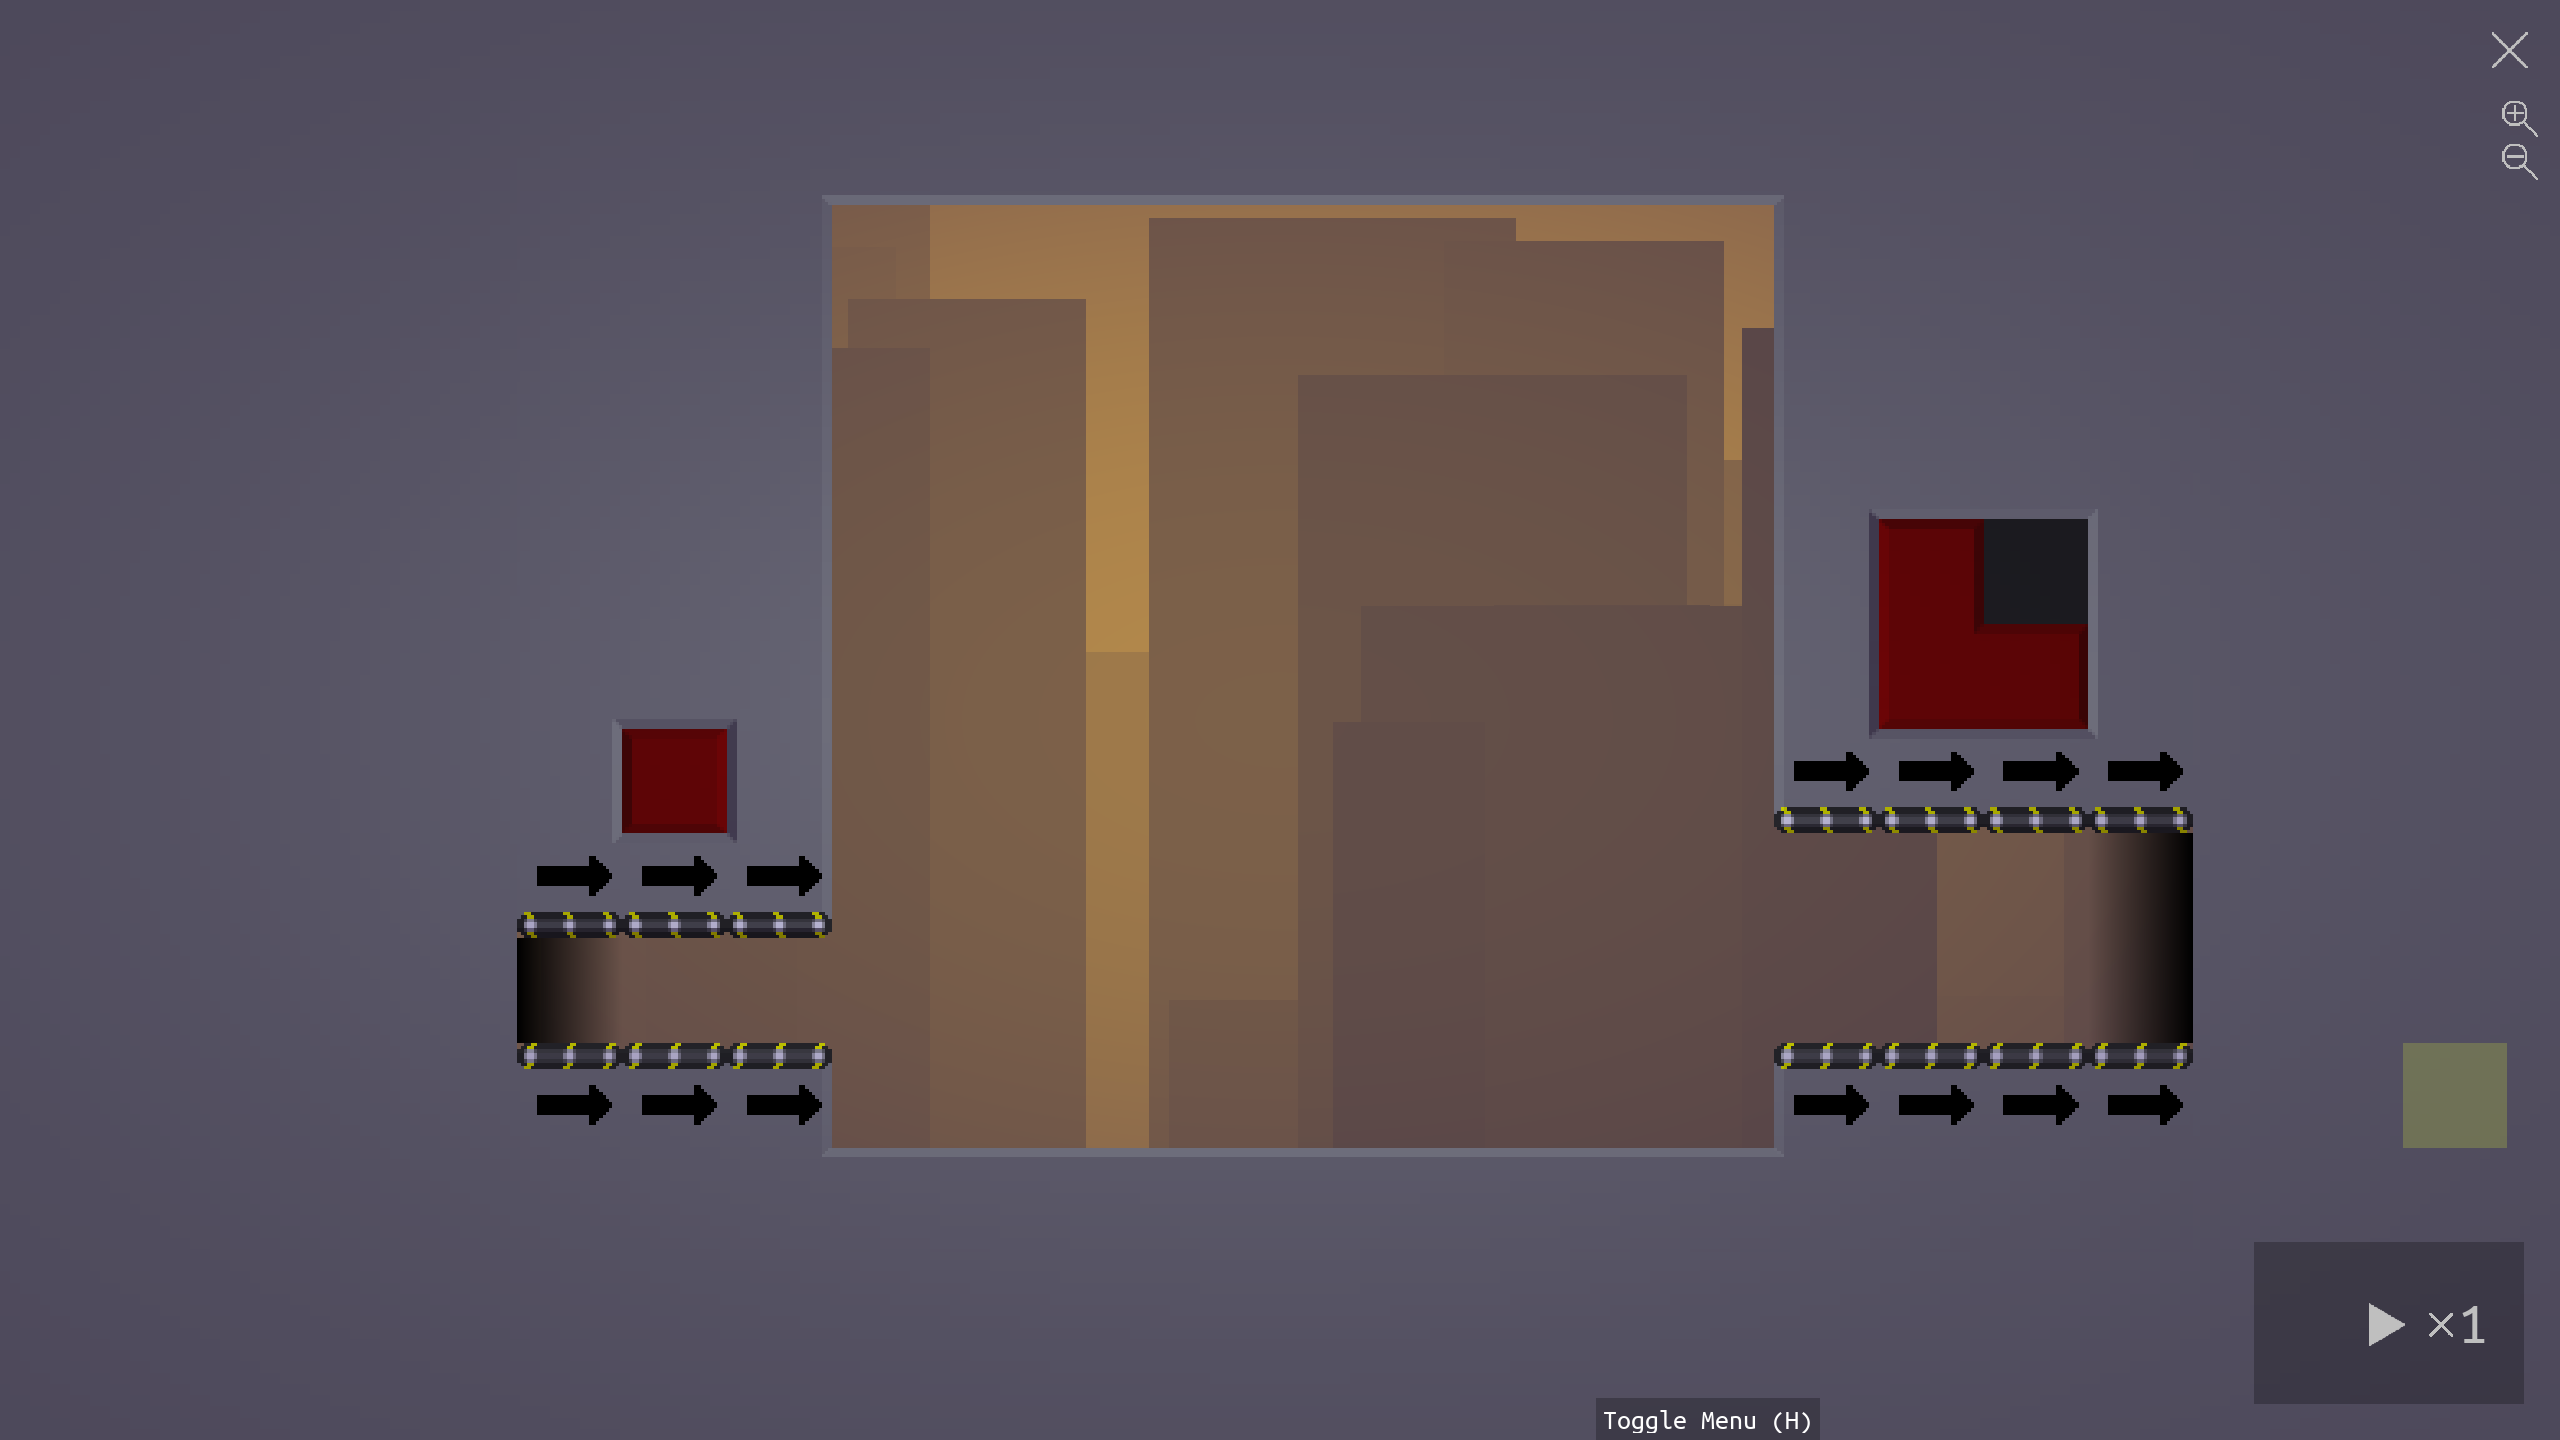
Finally, we can add the win condition to the level by writing the command set_quota_info(1, 50, "triangles") in the console. 1 is the index of the checker we want to add a quota to (the first checker being 1, the second 2, and so on - but we only have one here). 50 is the number of objects required. Then "triangles" is a string telling the game what to call the objects expected; note that it must be enclosed in quotation marks.
After refreshing the level, we will now have a fully functioning puzzle.
Finishing Up
Finally, we need to package the created level as a mod. Close Warp Factory and locate the save file we were just working on - it will be at Simple Example/Example Level/save0 in your save directory. Copy this file to the Example Level folder in your mod and replace the existing file "start_save" with this new save. This tells the game to load that file whenever the player chooses to create a new save for the level.
In your favorite text editor, open the file setup.lua. Its contents are as follows:
assert(load(assert(builder:open_text("setup_utility.lua"))))()
standard_setup({
  in_creation_mode = true,
  standard_resize = true,
  blocks = {"Red.png"}
})
The first line just loads some standard functions for setup. The line in_creation_mode = true, tells the game to open all the creation tools that we used. Before sharing the mod, we want to remove that line to turn off creation mode. The next line standard_resize = true, tells the game to allow the player to resize the level and automatically adjusts things so that these resizes do not break generators and checkers. The final line blocks = {"Red.png"} instructs the game to allow things to be painted red - it loads a 32 x 32 image from the library called Red.png (which happens to be all red) - we can add more blocks to this as blocks = {"Red.png", "Green.png"} if we'd like - and can even add new image files to the level's directory and load them.
With this done, you now how a fully functioning mod which creates a single new level.